Contents
Mode 5 · First Steps: What to Do After Installing Linux Mint
Getting Comfortable in Linux
If you’re wondering what to do after installing Linux Mint, this mode is your quick orientation to everyday use. Linux is already installed and running — the hard part is done. Now it’s just about learning where a few familiar things live, how to install software, and how to handle the basics without any technical rabbit holes.
Think of this as orientation, not configuration. We’ll cover installing programs, running updates, finding where your files are stored, and setting up language input (like Japanese) if you need it. By the end, Linux should feel less like “a new system” and more like your computer again – just faster, quieter, and fully under your control.
Linux Starts Differently
When Linux boots, that’s it.
There’s no account to create.
No cloud service to sign up for.
No subscription prompts.
No advertisements in the start menu.
You arrive at the desktop and can begin working immediately.
Your computer responds to your commands. Nothing steps in front of what you’re trying to do. There are no background pop-ups asking you to “finish setting up” or connect to additional services.
Everything from here is just practical daily use.
Understanding the Desktop
Linux Mint will feel familiar fast. A few names are different, but the layout is basically the same idea as Windows.
- Menu (bottom-left) → like the Windows Start menu
- You can open it by clicking the Mint logo, or by pressing the Windows key.
- In Linux, the Windows key is usually called the Super key.
- Panel (bottom bar) → like the taskbar
- This is where your open apps and pinned shortcuts live.
- System tray (bottom-right) → the small icons area
- Wi-Fi, sound, battery (laptops), and updates usually show up here.
If you prefer having familiar desktop icons similar to Windows’ “My Computer” and “Recycle Bin”, you can enable them.
Adding Desktop Icons (Optional)
- Right-click on an empty area of the desktop then click customize. You will see a window like the one below. Here you can adjust the desktop icon spacing using the sliders on the bottom and right-hand-side.
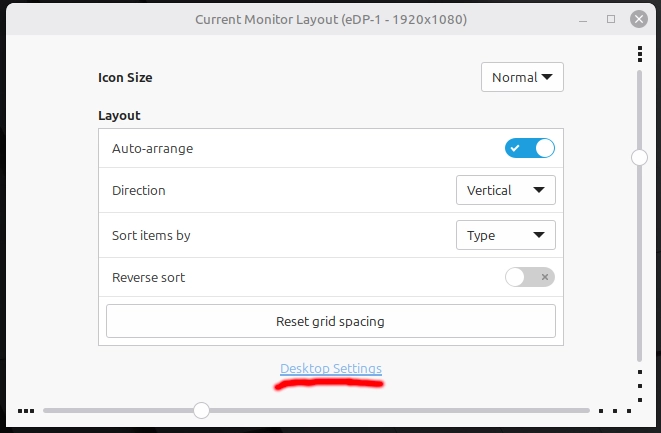
- Click Desktop Settings
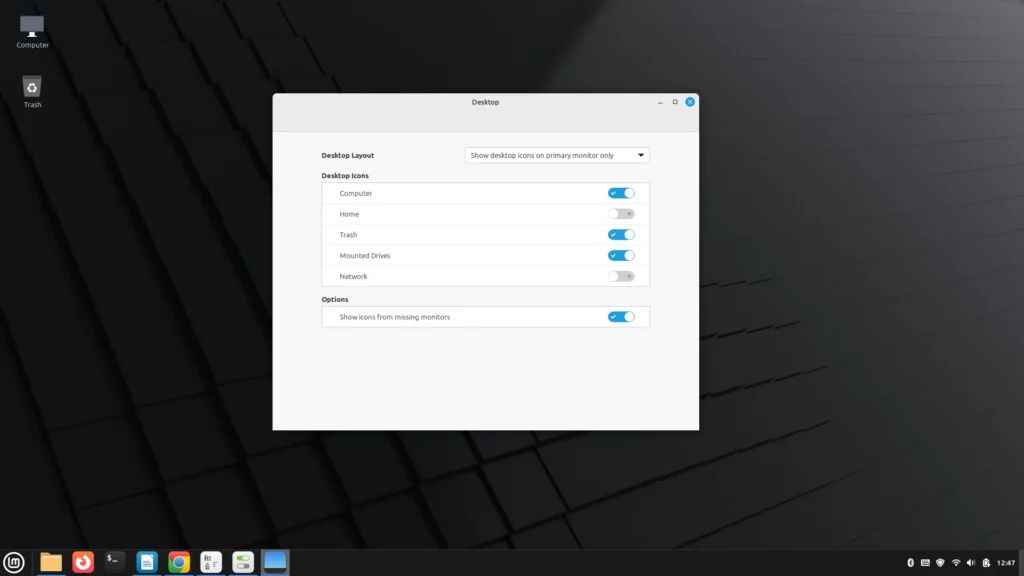
- Enable:
- Computer
- Trash
- Home Folder (optional but useful)
These icons work the same way you’d expect — double-click to open.
Web Browsing
- Linux Mint already comes with Firefox, so you can get online immediately. If Firefox is fine for you, keep it and move on. If you prefer a Chrome-style browser, we’ll install one in step 4A.
How to Install Software on Linux Mint (Software Manager + .deb Files)
Programs in Linux are installed a little differently than Windows. In most cases, you’ll use the Software Manager, which works like an app store. Occasionally, a program is downloaded directly from its official website as a .deb file.
There is also a command-line method, but you don’t need it for typical daily use. We’ll stick to the two straightforward approaches.
A. Install Apps with Software Manager (Recommended Method)
On Linux Mint, installing programs does not mean searching the web and downloading installers.
Instead, you use Software Manager – a built-in app store that handles installation safely and automatically.
This is the default habit you want to build.
Open Software Manager
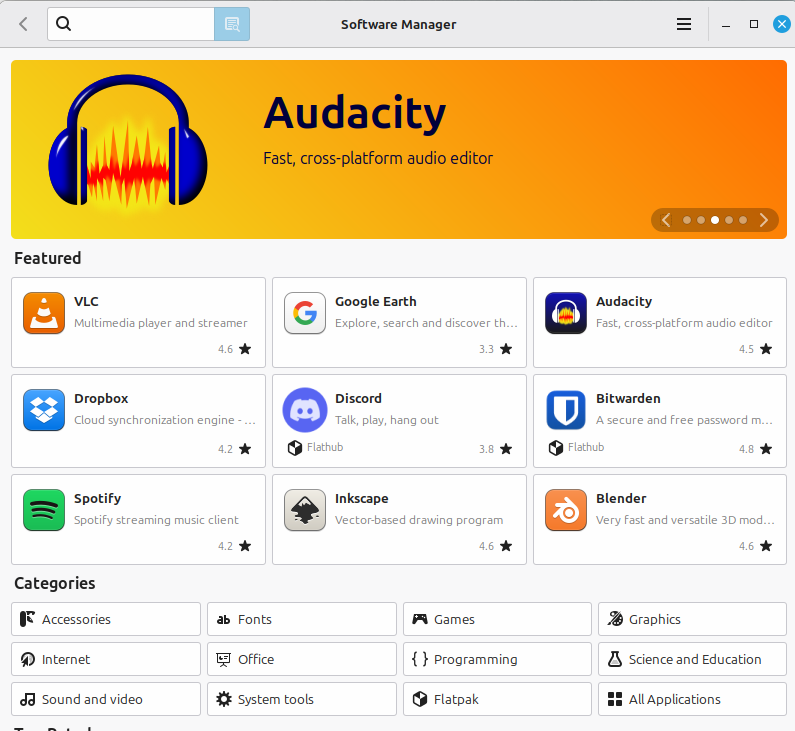
Open the menu and click Software Manager.
You’ll see a searchable catalog of applications that are tested and maintained for your system.
Everyday Basics for most people
Let’s install a few common programs to show what’s available on Linux Mint.
Example 1 — Chromium (Chrome-style browser)

- Search for Chromium
- Click it
- Click Install
That’s it.
No website.
No installer file.
No upselling pop-ups.
Example 2 — VLC (Plays Almost Any Video)
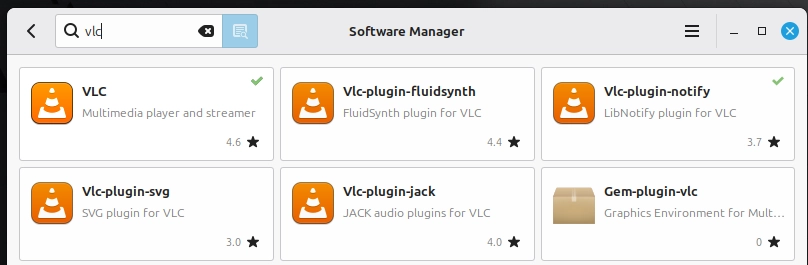
Search for VLC and install it the same way.
VLC is optional – but it’s a good example of how common, everyday software is readily available.
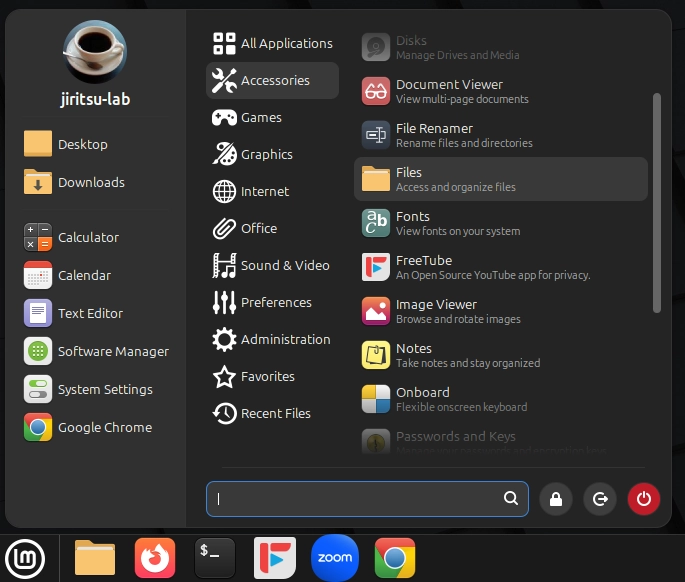
More Optional Examples
- GIMP (photo editing)
- Steam (games)
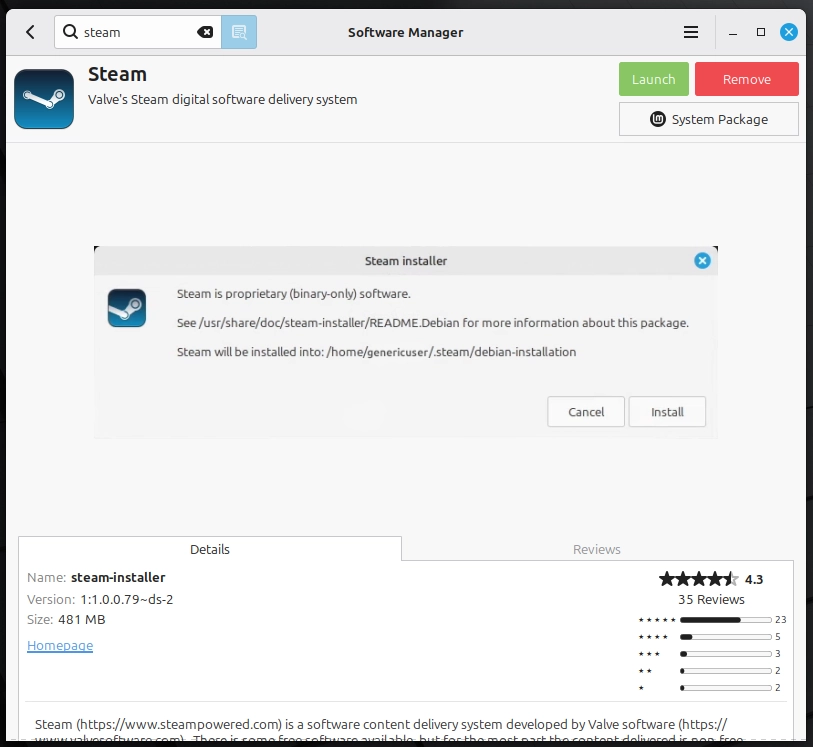
You don’t need them, but they show that Linux runs mainstream desktop apps, not just specialist utilities.
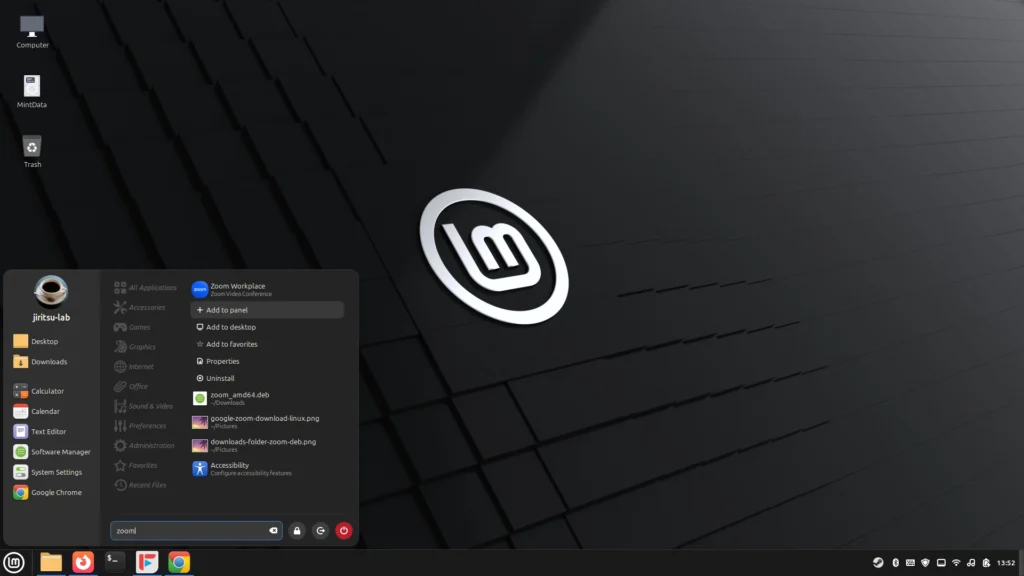
B. Installing a .deb File (Zoom Example)
Linux Mint has a built-in app store called Software Manager, and it’s usually the safest place to start. But in real life, you’ll also run into apps that aren’t listed there – or the version in Software Manager might be older. When that happens, it’s common to install from the app’s official website or the project’s GitHub Releases page.
A .deb file is basically the Linux Mint version of a Windows .exe installer. After you download it, you can usually double-click it to install.
In this guide, we’ll use Zoom as a simple example of the “download a .deb and install it” method.
Safety rule: only download installers from official, trusted sources (official site, or the project’s official GitHub Releases page).
Steps
- Open Firefox (or your preferred browser).
- Go to zoom.us/download.
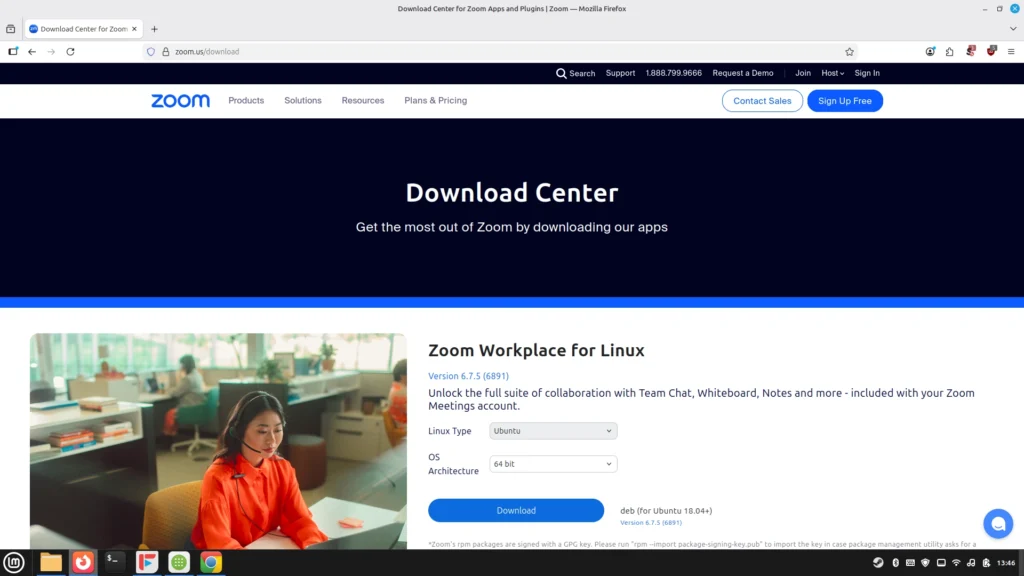
- Choose Ubuntu (.deb) (Linux Mint is Ubuntu-based, so this works)
- Download the file
- Open your Downloads folder
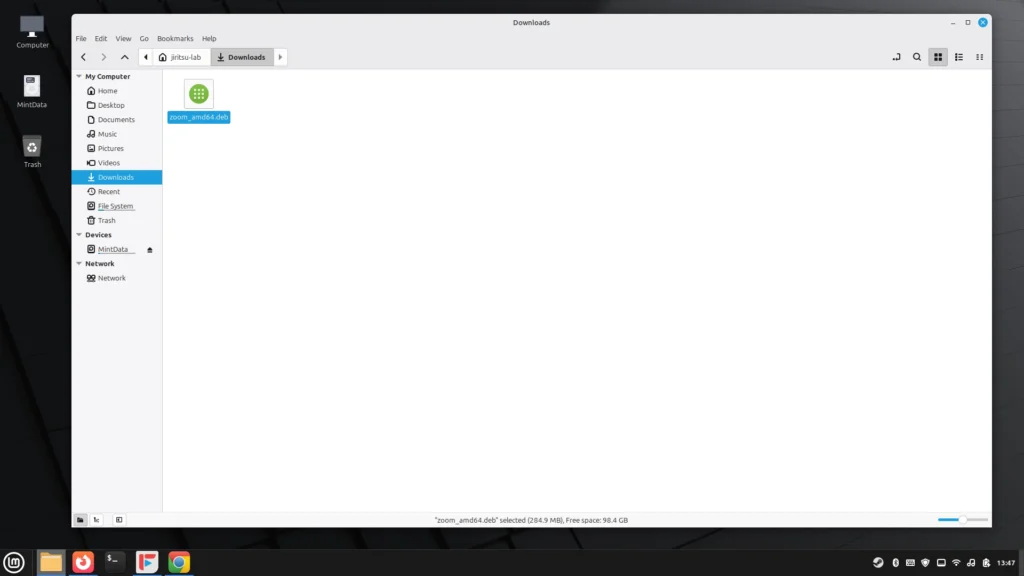
- Double-click the .deb file
- Click Install
- Enter your password (you’ll often be asked for this when installing software)
Result: Zoom will now appear in your application menu.
Optional: Press the Super key, type Zoom, then right-click the Zoom icon and choose Pin/Add to panel (wording may vary).
Key concept: .deb ≈ Windows .exe (an installer file)
Running Updates
Updates work differently in Linux Mint than in Windows.
In Windows, updates often download automatically, install in the background, and sometimes require a restart at inconvenient times.
In Linux Mint, nothing installs without your approval.
When updates are available, the shield will usually show a small indicator (often an orange colored dot or number)
When nothing is waiting, it appears as a regular shield.
Either way, you can click it anytime to open Update Manager and confirm your status.
To install updates:
- Click the shield icon
- Click Install Updates
That’s it.
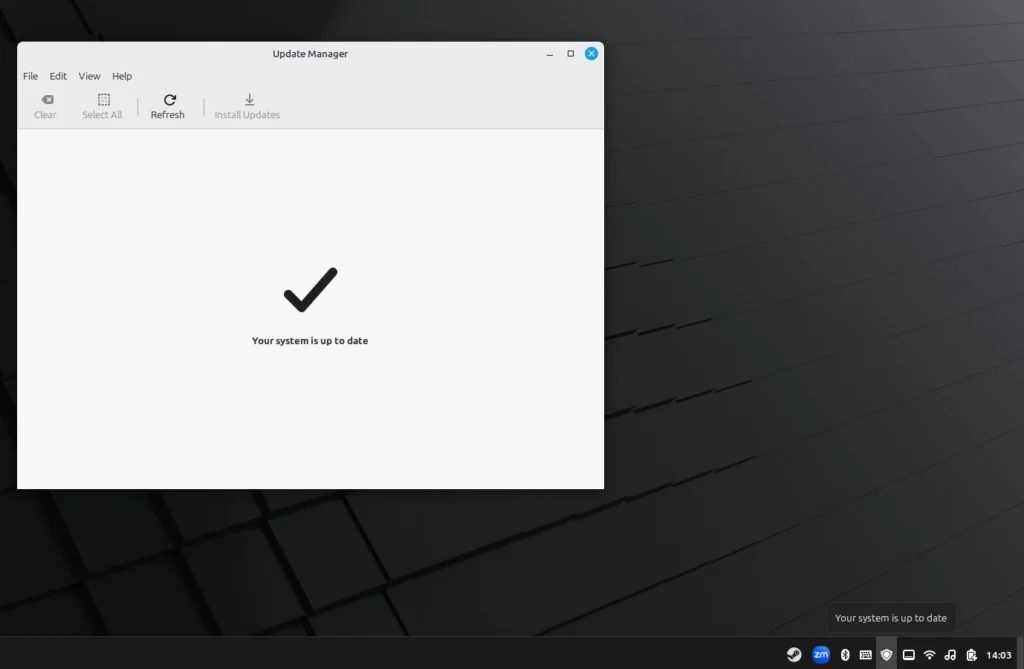
Updates are usually small and install quickly. If a restart is required (for example, after a kernel update), Mint will clearly notify you, but it will never restart your computer without asking.
You choose when to install updates. You choose when to reboot.
The system works around you – not the other way around.
Where Your Files Live
On Linux Mint, your personal files live in one main place: your Home folder.
To see it, open Files (the file manager).
You can do this from the menu, or by clicking the file/folder icon on the panel.
Home = Your Personal Space
Inside Home you’ll see familiar folders like:
- Documents
- Downloads
- Pictures
- Music
- Videos
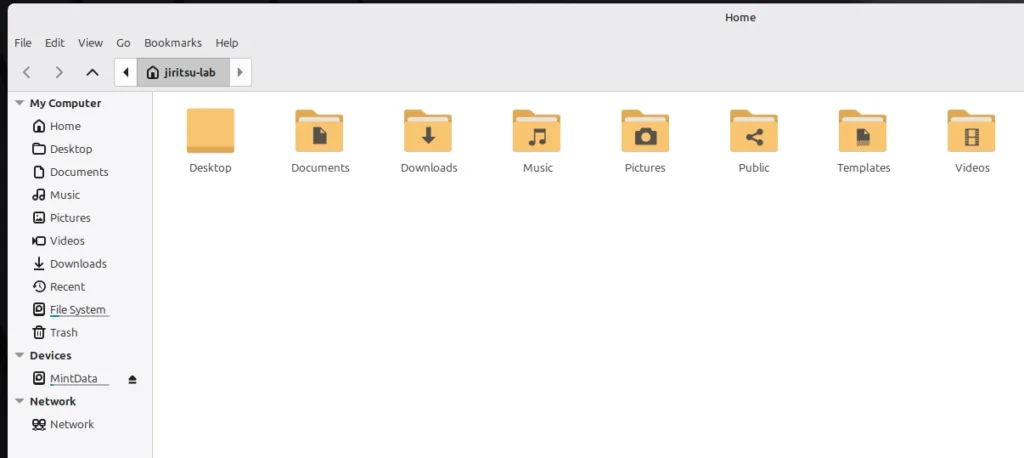
For most people, this is where everything should go – just like keeping your personal files inside your user folder on Windows.
Tip: Your Downloads folder is where browser downloads and .deb installers will usually land.
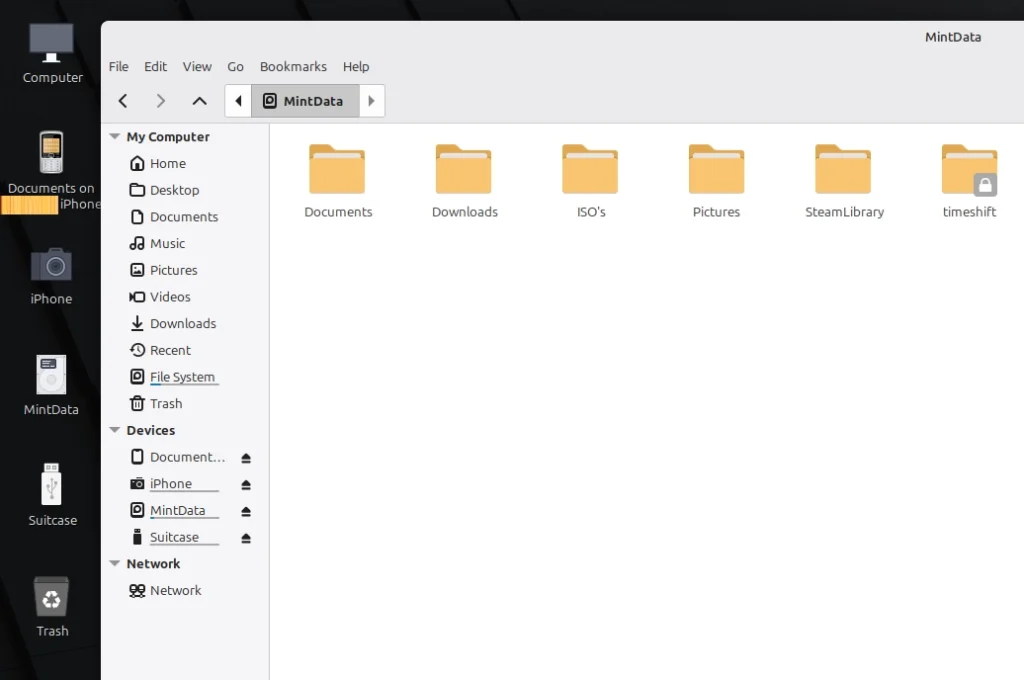
External Drives and other Devices
When you plug in a USB drive, external SSD, phone, or other storage device, Linux Mint will usually show it in the left sidebar of the Files app under Devices. Click the device name to open it and move files normally (drag-and-drop works just like Windows).
In Linux, a drive is often described as mounted. “Mounted” simply means the system has connected the device and is ready to read from it (and usually write to it as well).
When you’re finished, unmount external drives before unplugging them by clicking the eject icon next to the device name. This helps prevent file corruption and makes sure any pending writes are completed.
In the screenshot below, three devices are mounted: an iPhone, a secondary internal hard drive called MintData, and a USB flash drive named Suitcase.
Simple rule
If you keep your personal files inside Home, Linux will feel straightforward and predictable – and you won’t need to touch system folders.
Note: In the left sidebar, you may see File System. That’s the computer’s internal system area. For most people, there’s no reason to use it for everyday file storage or routine tasks. In this guide, focus on Home, and on any external drives that appear under Devices in the sidebar.
Setting Up Japanese Input in Linux Mint 22.3
Goal: Enable Mozc so you can switch English ⇄ Japanese with Ctrl + Space.
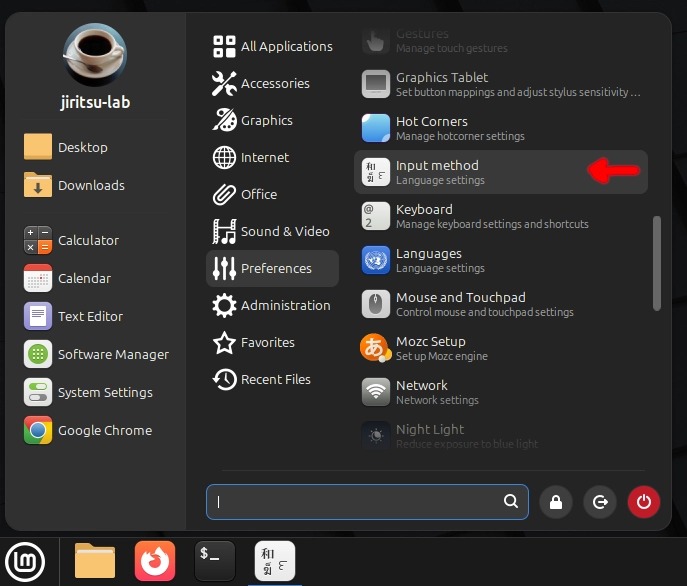
- Open Input Method
- Menu → Preferences → Input Method
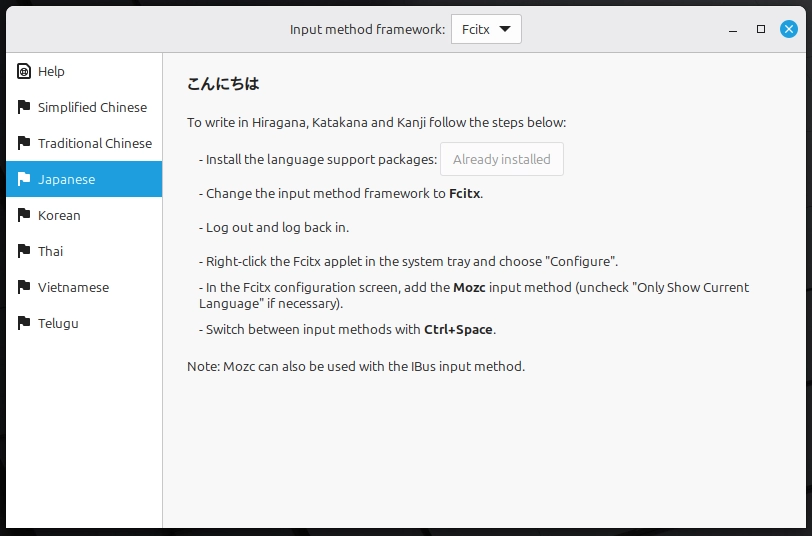
- Install Japanese language support
- In the left-hand panel, click Japanese
- On the right-hand side, click Install the language support packages (if needed)
- Switch the framework to Fcitx
- At the top of the window, set Input method framework to: Fcitx
- Log out of Mint, then log back in
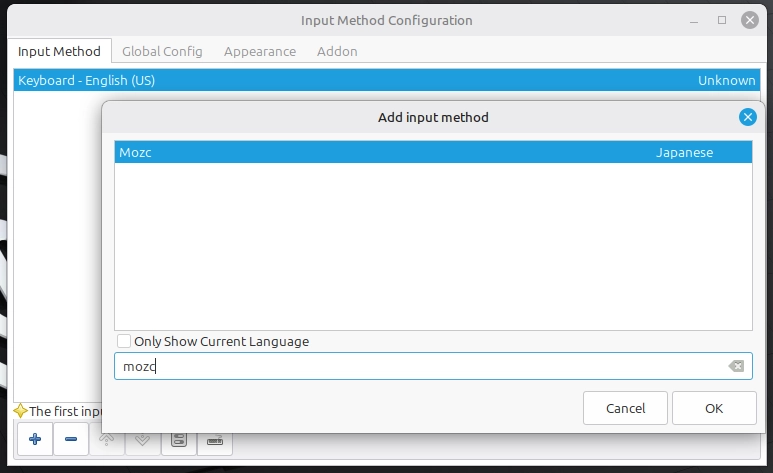
- Open Fcitx configuration
- In the system tray, right-click the keyboard/language icon
- Click Configure
- Add Mozc
- Click the + (plus) button at the bottom
- Uncheck Only show current language
- Search for Mozc
- Add Mozc
- Restart Fcitx
- Right-click the tray icon again
- Click Restart
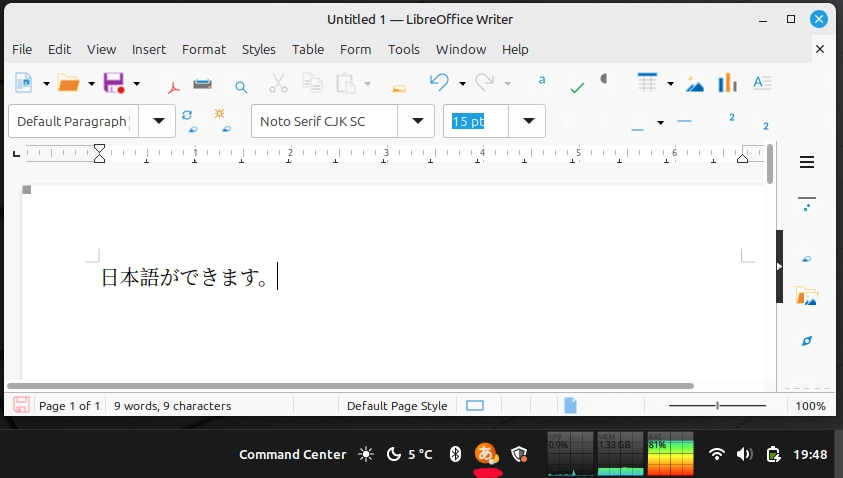
- Test it
- Open LibreOffice Writer
- Press Ctrl + Space
- You should now be able to switch instantly between English and Japanese
- You should also be able to see the keyboard icon turn into the hiragana symbol and back to the keyboard icon when you switch back to English.
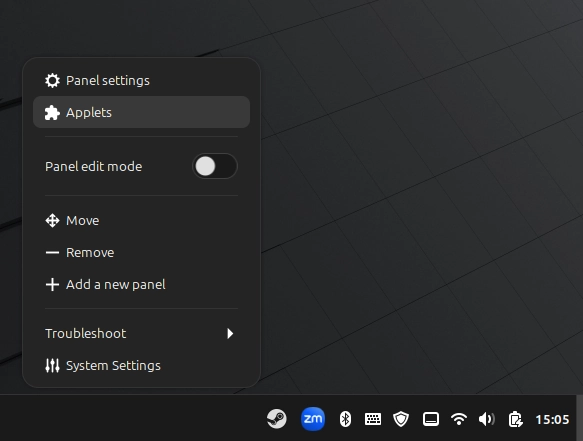
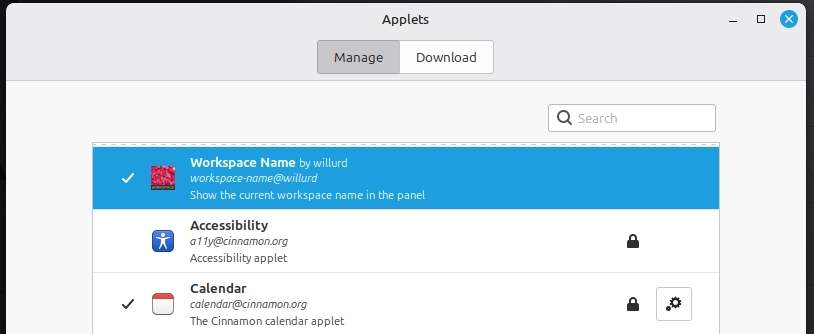
Customizing the Panel with Applets (Optional)
The panel at the bottom of your screen isn’t fixed. You can customize it to suit the way you work.
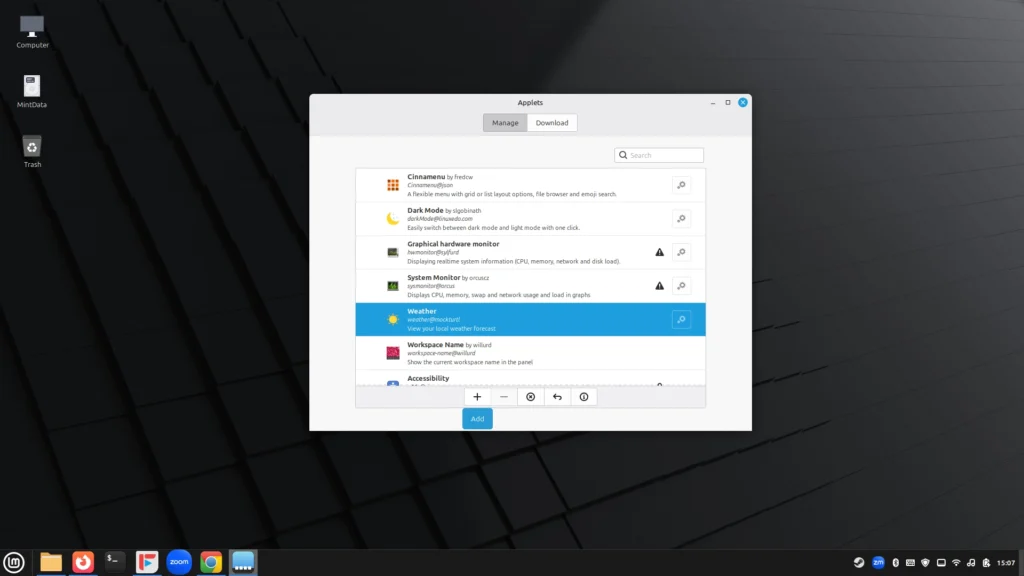
Right-click on the panel and choose Applets. This opens the Cinnamon Applets manager, where you can add small tools directly to your panel.
Applets are lightweight utilities that sit in the panel and give you quick access to useful information or controls. They don’t open large windows, they simply make everyday tasks easier.
Some helpful examples:
- Weather – See current conditions at a glance.
- System Monitor – View CPU, memory, and network activity in real time.
- Workspace Name – Display your current workspace.
- Dark Mode Toggle – Switch appearance instantly.
- Keyboard Layout Indicator – Quickly change input languages.
To add one:
- Right-click the panel
- Select Applets
- Click Download (if needed)
- Select an applet and click Add (the plus “+” symbol)
You can remove or rearrange them anytime.
Applets are optional, but they’re one of the reasons Linux Mint feels flexible without being complicated. You choose what lives on your panel and nothing is forced on you.
Just to clarify once more:
This is optional. Linux works fine without customizing the panel and applet tray.
Optional: Using Workspaces for Productivity
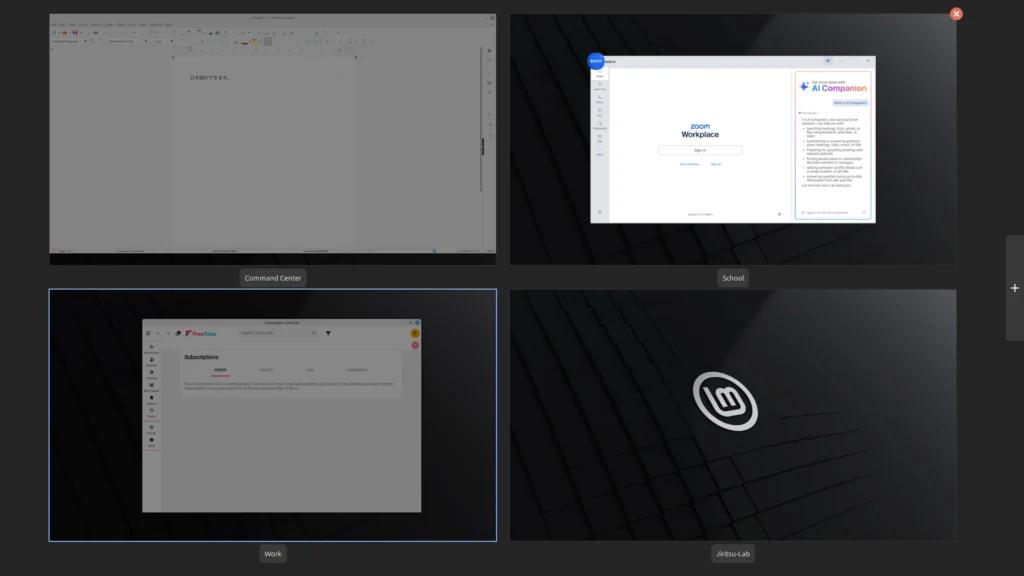
Linux Mint includes Workspaces, which are similar to Windows Virtual Desktops. They let you separate tasks across multiple desktop spaces – so your windows stay organized without constantly minimizing, resizing, or hunting through the taskbar.
For example, you might keep a document open on one workspace, a browser on another, and a video call on a third. The screenshot below shows four workspaces.
How to use Workspaces (the simple way):
- Press Ctrl + Alt + Up to open the Workspace Overview.
- Click the + on the right to add more workspaces.
- Click a workspace name to rename it (e.g., Work, School, Writing).
Useful shortcuts:
- Ctrl + Alt + Up → Workspace Overview
- Ctrl + Alt + Left / Right → Switch workspaces
- Ctrl + Alt + Down → Show windows on the current workspace
Workspaces are especially useful if you like keeping tasks separated. You can leave one workspace “set up” with everything open, switch to another to do something else, then return exactly where you left off.
Pro Tip: The Workspace Name applet (by willurd) is a simple but genuinely useful add-on for the panel. It displays your current workspace name in the system tray, so you always know which workspace you’re in at a glance.
Please enjoy your new operating system!
Linux is installed, updated, and ready for daily use.
No accounts. No subscriptions. No forced upgrade cycles. No background steps waiting for you to “finish setup.” Your computer is simply yours again.
From this point forward, you can treat it like any standard PC – just faster, lighter on system resources and fully under your control.
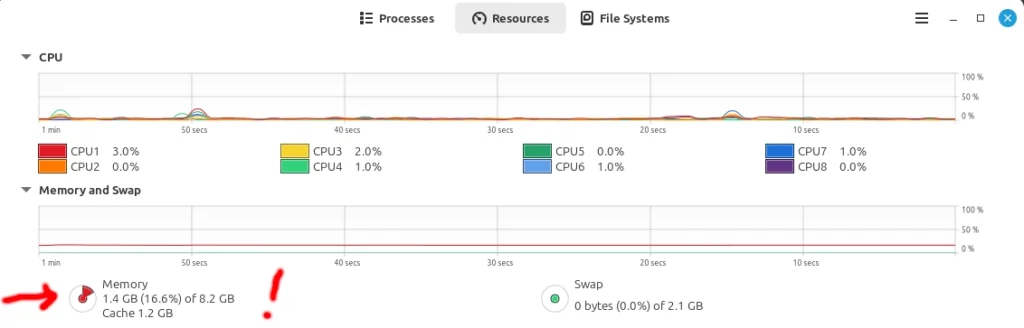
On this particular system, immediately after boot, Linux Mint is using about 1.4 GB of RAM. That leaves most of the memory free for many browser tabs, documents, video calls, media editors and many other simultaneous tasks.
Older Windows 10 machines often feel slow not because the hardware is broken, but because the operating system consumes more resources in the background. With Linux Mint, very little runs unless you ask it to.
That breathing room is what makes older computers feel responsive again.
There is nothing else to configure.
You can simply use your computer.