Contents
Mode 4 | Installing Linux Mint Alongside Windows
Path A – Dual Boot: Install Linux Mint Alongside Windows (Internal Drive)
Assumption to continue with Path A
By this point, you’ve already completed Mode 3 – Choose How to Install Linux, where you decided how Linux Mint will be booted on your computer.
You also have already disabled secure boot in your computer’s firmware and have disabled fast-startup in Windows.
You should also have your Linux Mint USB boot drive ready, which you created earlier in Mode 1 — Create the Linux Mint USB, and you’ve already used the boot menu and had a short trial run with Linux Mint in Mode 2 — Try Linux Without Installing.
If you chose External SSD in Mode 3, skip this section and continue to Mode 4 — Path B: Install Linux Mint on an External SSD Drive.
This walkthrough includes photographs for nearly every step, captured during real installation(s) on actual hardware. Some images were taken with a phone (rather than saved as perfect screenshots), so a few may look slightly blurry. The key buttons, menus, and drive labels should still be clear enough to follow. If anything looks different on your screen or you want a second set of eyes before clicking Install Now, feel free to reach out via the Contact page.
Proceed slowly. Confirm the correct drive before applying changes.
A1. Back Up First (Non-Negotiable)
- Back up anything from your Windows drive that you can’t replace and can’t afford to lose, (minimum: Documents / Desktop / Photos).
- Confirm you still have enough free space on C: (Mode 3 target: ideally 100GB+ free).
- Do a full shutdown (not Restart).
A2. Boot the Mint USB (Live Session)
- Plug in the Linux Mint USB.
- Power on → open Boot Menu → select the USB (UEFI entry).
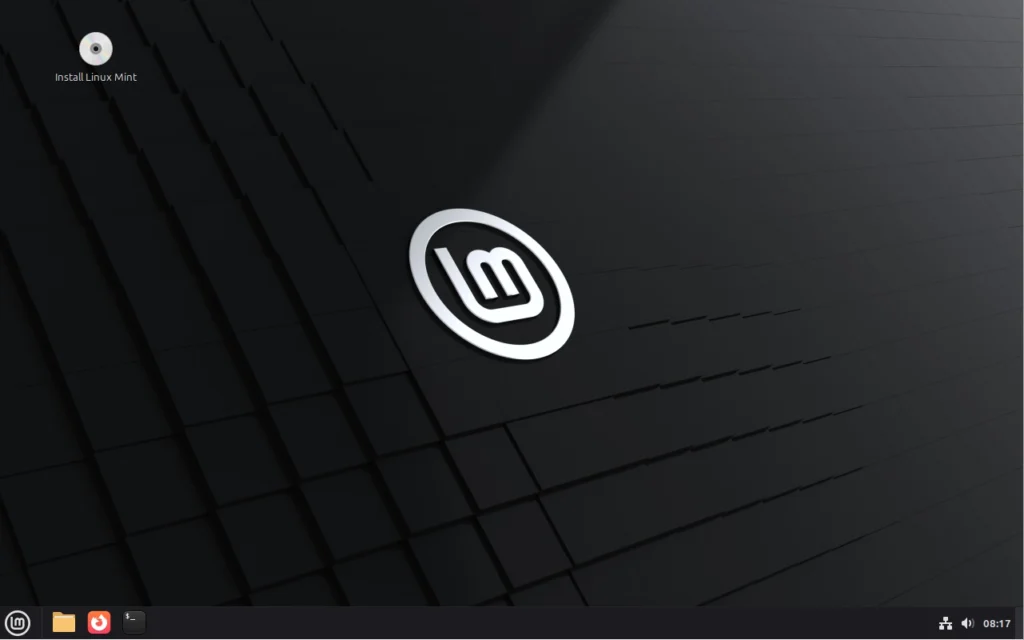
- When Mint loads, choose Start Linux Mint (live environment).
A3. Run the Installer
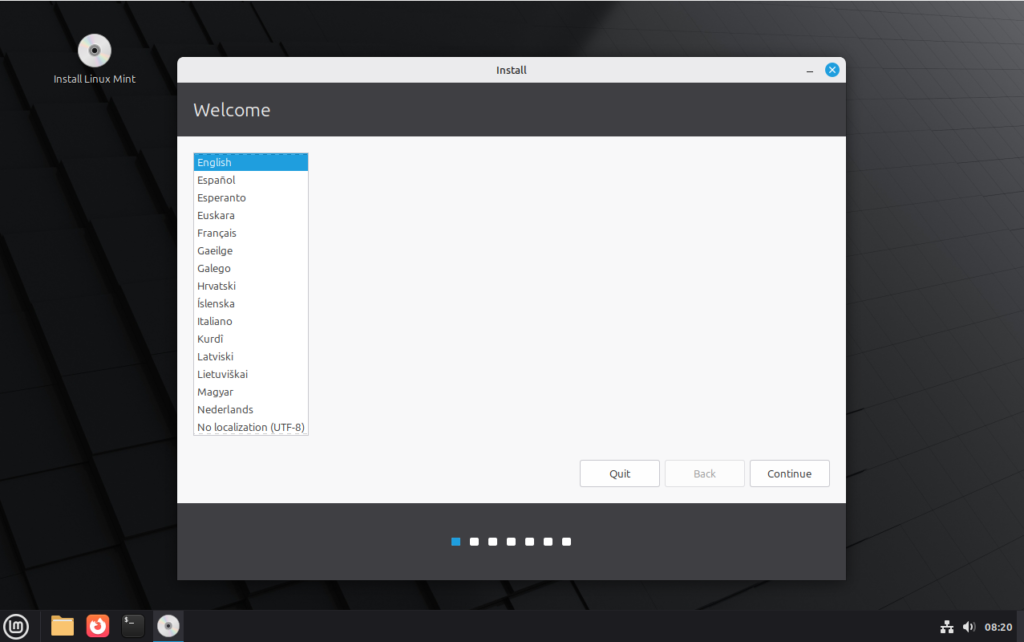
- Double-click Install Linux Mint.
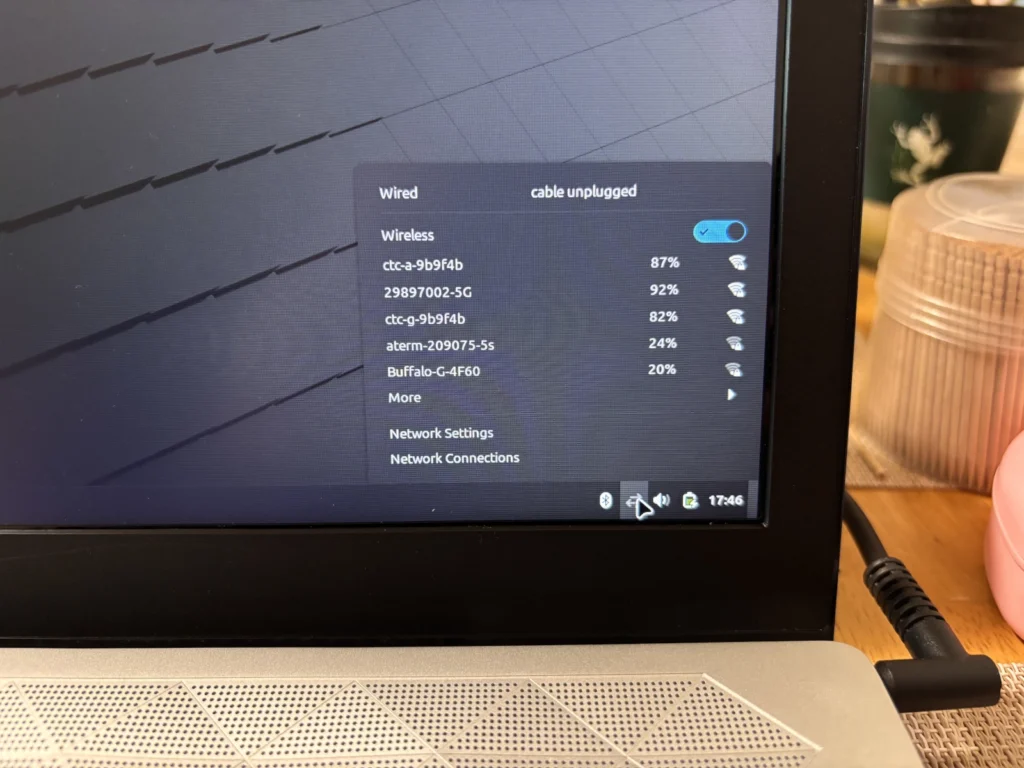
- Language → Keyboard → (optional but recommended) connect to Wi-Fi (allows updates and drivers to install during setup)
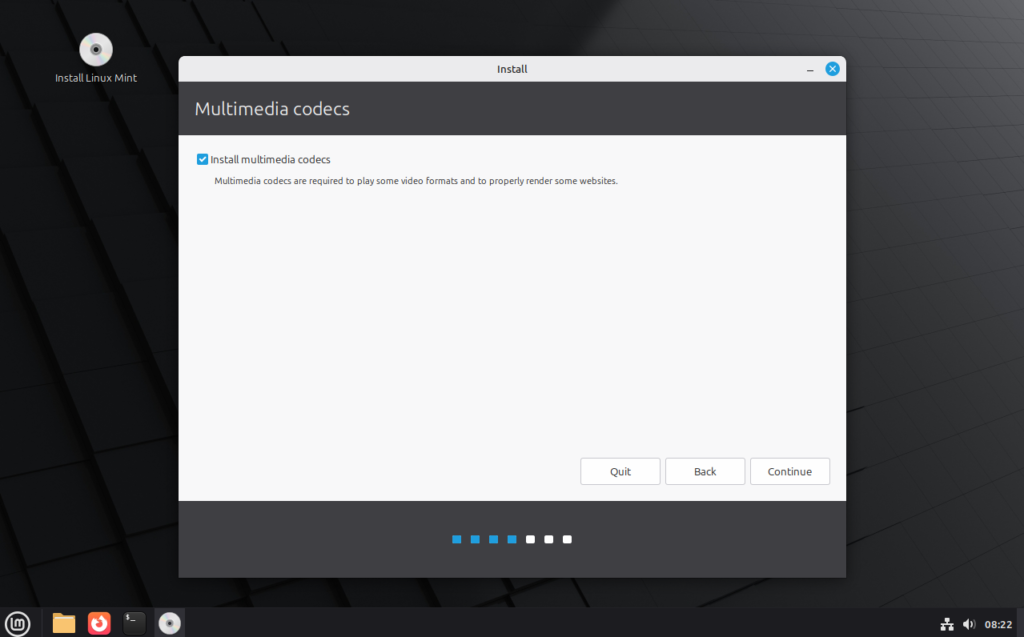
- Codecs and Secure Boot Check (Important)
If you see the options highlighted in red below, Secure Boot is still enabled on your system.
For this guide, Secure Boot should be disabled before installation.
Do not continue from this screen if you see the options highlighted in the red rectangle on your screen. To be clear, you should see ONLY the checkbox for “Install multimedia codecs” before continuing.

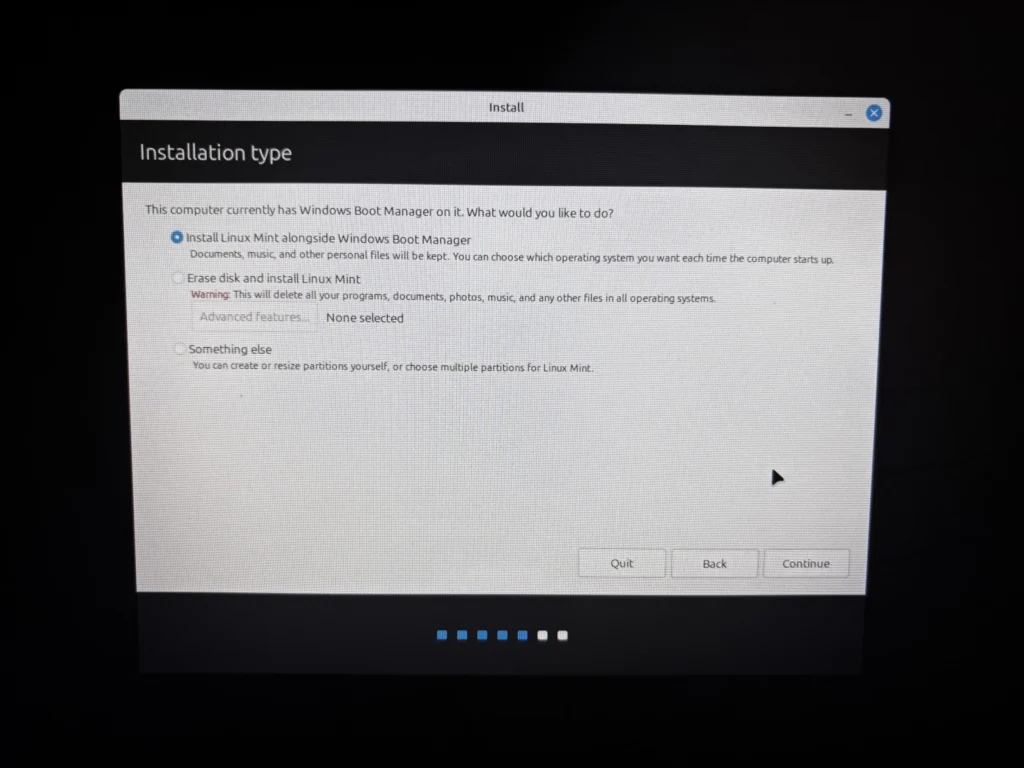
A4. Choose the Dual-Boot Install Type
On Installation type, pick:
Select “Install Linux Mint alongside Windows Boot Manager“
Do not choose “Erase disk and install Linux Mint.”
Then:
- Use the slider to allocate space.
- The installer allows smaller sizes, but 40–60GB is the practical minimum.
If you can afford more, Linux benefits from extra space over time. - Comfortable range: 80–120GB+ (if you can afford it)
- If the slider doesn’t move far enough, it usually means your Windows drive is too full.
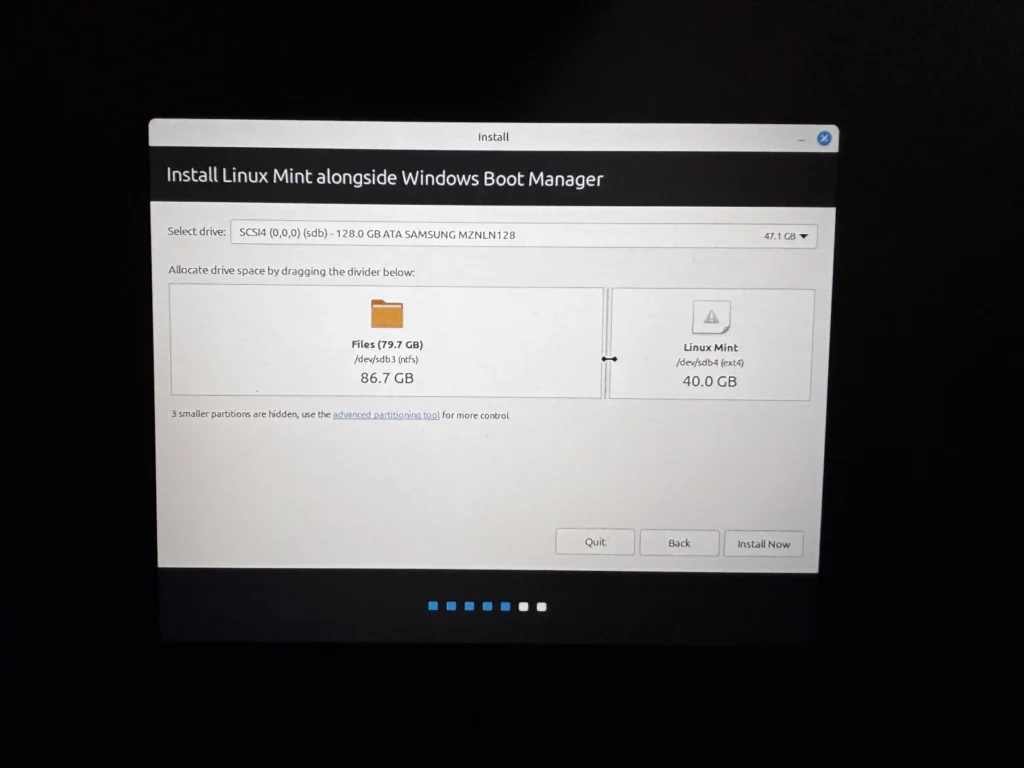
In this screen, both Windows and Linux are being installed on the same physical drive.
You can tell because they are both listed under the same drive name (sdb).
- sdb is the internal drive
- Windows is shown using the NTFS file system and labelled “sdb3”
- Linux Mint will use the ext4 file system and is labelled “sdb4”
These are simply different ways each operating system stores files. They can safely coexist on the same drive without interfering with each other.
Click “Install Now” after you have allocated 40 or more GB to Linux Mint.
A5. Commit Disk Changes Carefully
When the installer warns it will write changes to disk:
- Confirm it still clearly shows Windows present
- Confirm you are targeting the correct internal drive (match by size)
- Confirm Mint is being installed into the newly allocated space
This screen looks scary, but read it carefully.
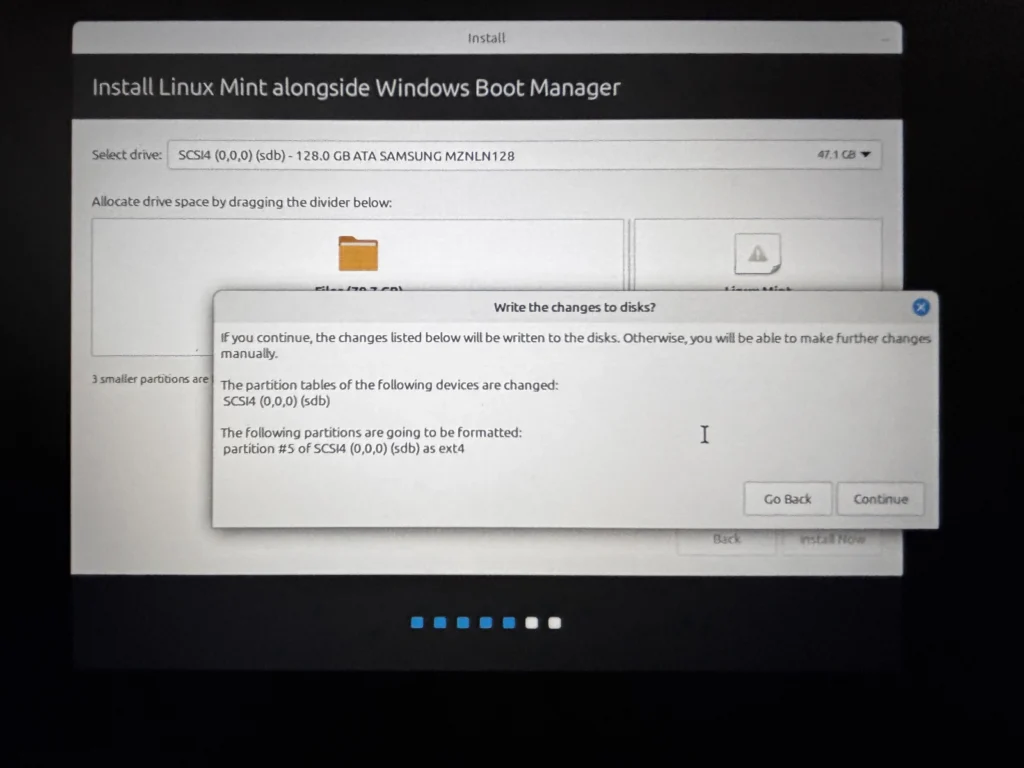
The installer should show one ext4 partition being formatted on the correct drive.
That ext4 partition represents the space you just allocated for Linux Mint.
Your Windows partition should not be listed as formatted.
Click continue.
A6. Finish Setup (Installer Steps)
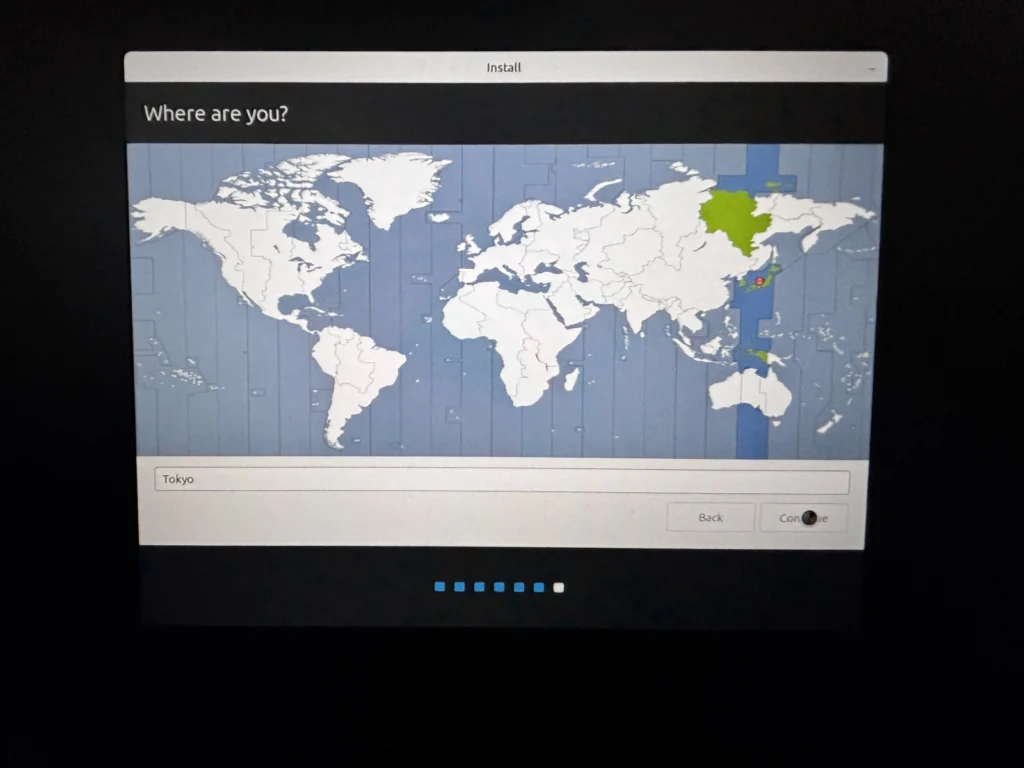
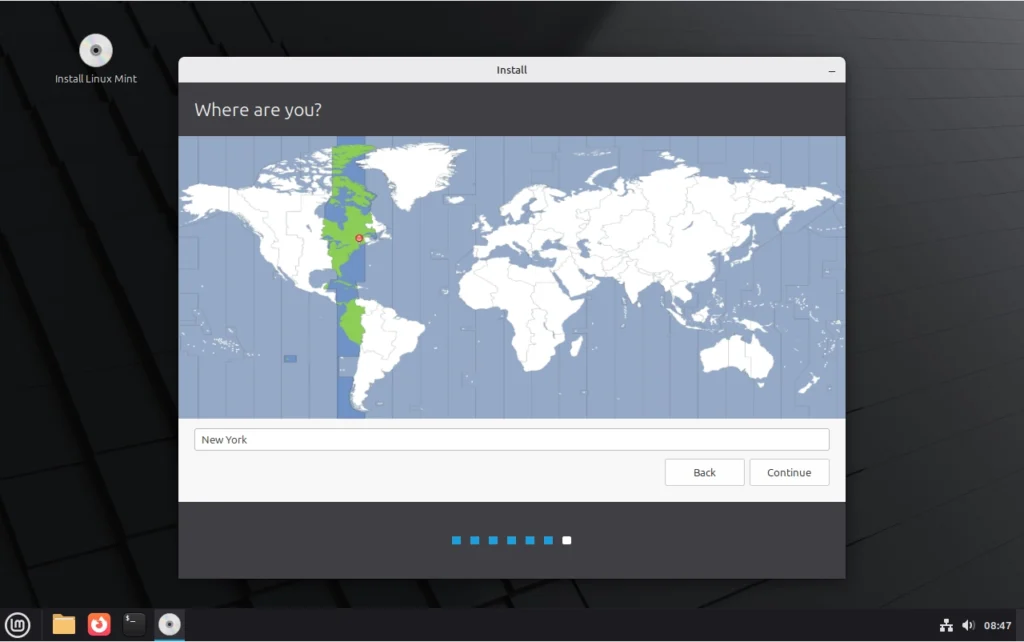
1) Choose your time zone
Select your region/city (this sets your system clock and time).
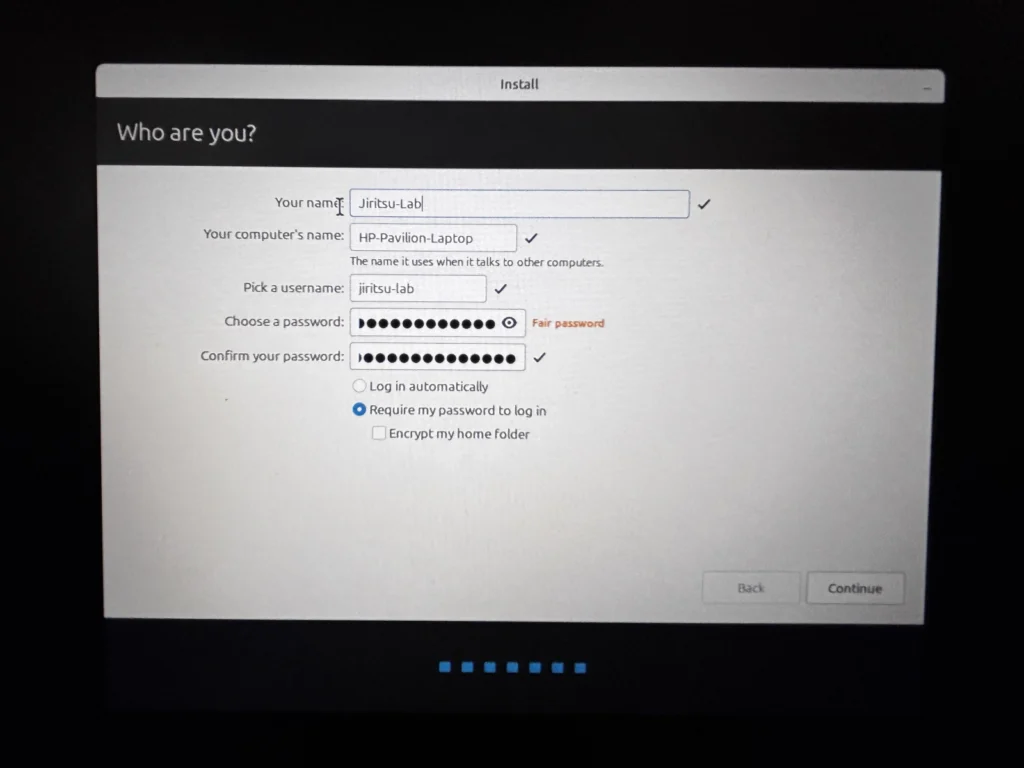
2) Create your user account
Fill in your name, computer name, username, and password.
- Choose Require my password to log in (recommended).
- Leave Encrypt my home folder unchecked for now unless you specifically need it.
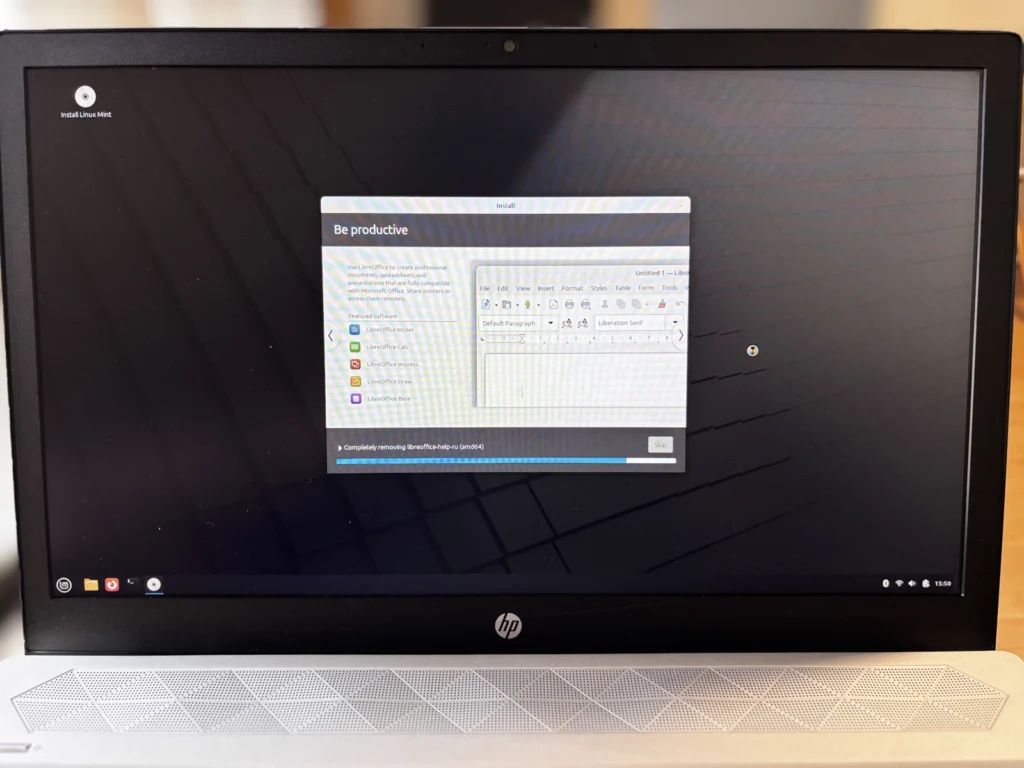
3) Installation runs in the background
Installation usually takes 10–30 minutes, depending on your computer and internet speed.
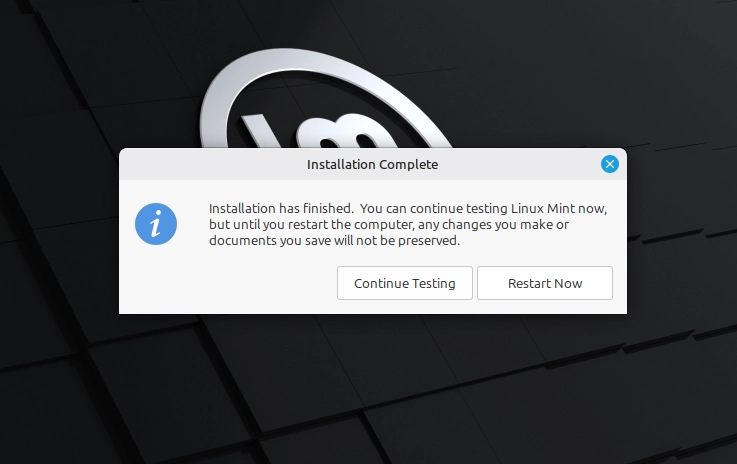
4) Restart when prompted
When installation is complete, the installer will offer to “Continue Testing” or to “Restart Now”. Choose Restart Now to confirm that the installation was successful.
5) Remove the USB and press Enter
You will see this message:
“Please remove the installation medium, then press ENTER”
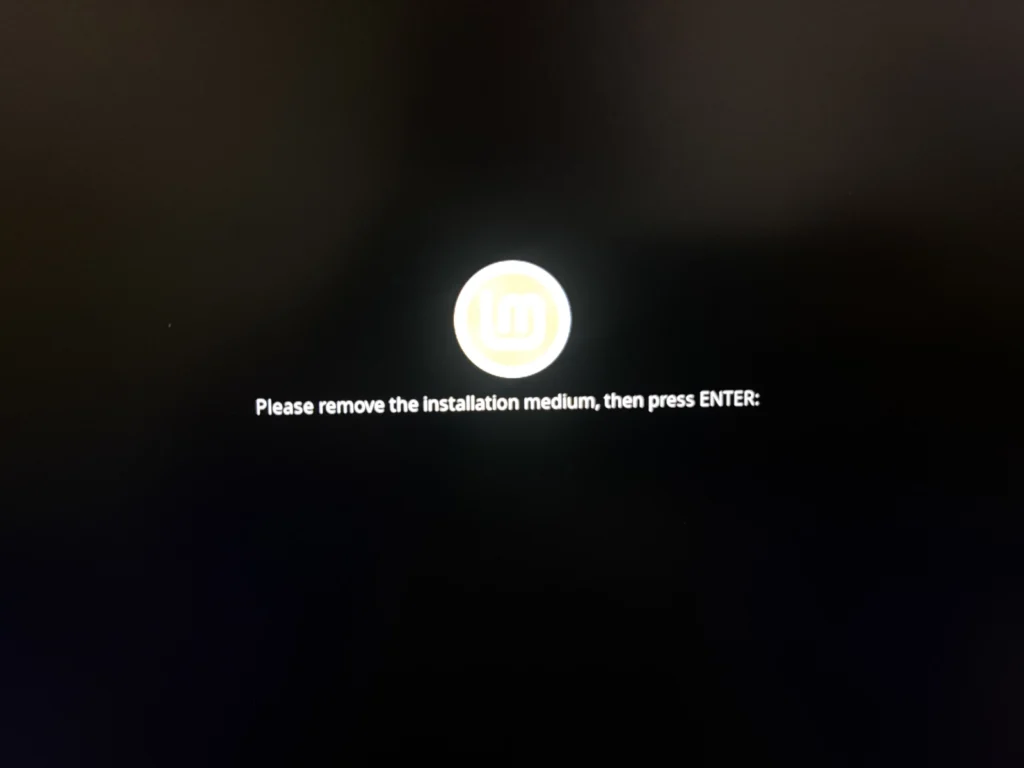
- Remove the USB drive
- Press Enter on the keyboard
A7. Verify the Result (Dual Boot Complete)
After restarting, you should see a menu that lets you choose which operating system to start.
This is the Grub boot menu for Linux Mint.
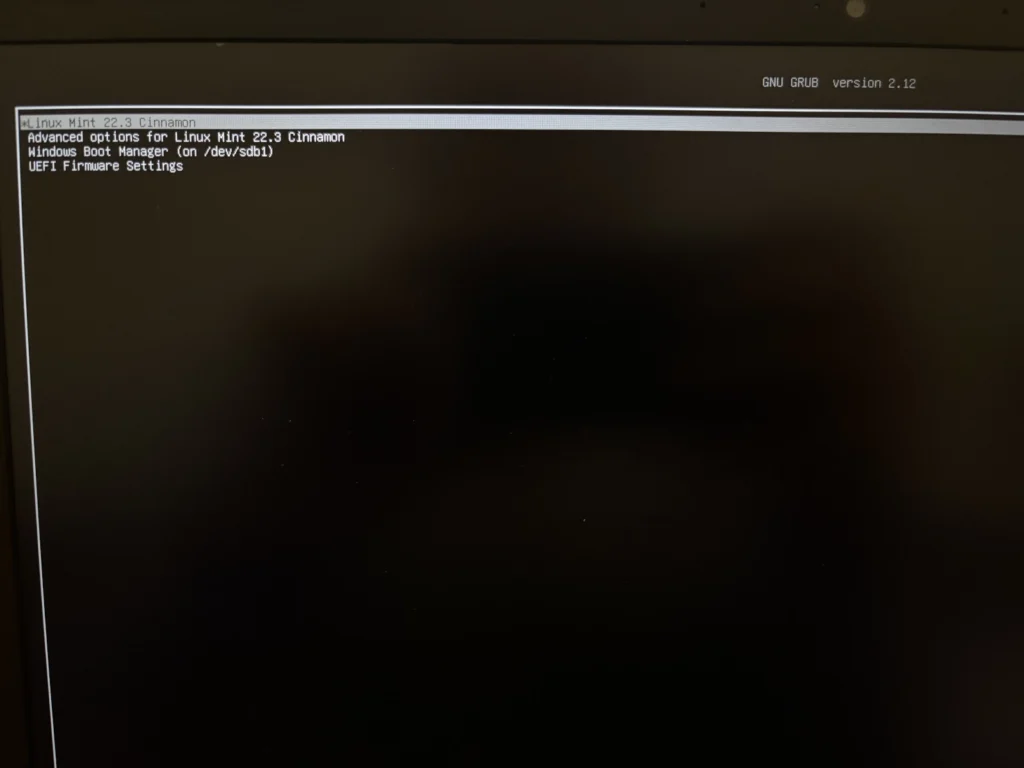
From here you can:
- Start Linux Mint
- Start Windows Boot Manager
Do this once
- Boot into Linux Mint to confirm it loads correctly.
- Restart, then boot into Windows to confirm Windows still works.
If both operating systems boot successfully, the dual-boot installation is complete.
You’re ready to continue to Mode 5 — First Setup Inside Linux Mint.
Mode 4 | Install Linux Mint to an External SSD
Path B. External SSD
Path B installs Linux Mint onto an external SSD, leaving the internal Windows drive unchanged. If the external SSD is unplugged, the computer returns to its original state.
External SSD installs are physically separate from Windows, but they are not necessarily “safer” for beginners. Because you must manually select drives and partitions, mistakes are more likely if you rush.
Back up first (non-negotiable).
Before continuing, copy any important files you can’t afford to lose (Documents / Desktop / Photos) to another location (cloud storage or a separate USB drive). This guide is careful, but no installation process is risk-free.
Recommended hardware for Path B (External SSD)
To proceed with Path B, you’ll need an external SSD (this is where Linux Mint will be installed).
If you already own one, you can skip this section and continue.
If you need to purchase one, these options work well for Linux installs and everyday use:
- SanDisk 2TB Extreme Portable SSD (For heavy storage needs): Ideal if you plan to store large video, photo, or backup libraries on the same drive.
- SanDisk 1TB Extreme Portable SSD (Very Reliable and Recommended for most users): Enough space for Linux, updates, and personal files without worrying about running out of room.
- SSK Portable SSD 500GB External SSD – (Faster, More Affordable)
This drive uses NVMe storage inside a USB-C enclosure, making it significantly faster than traditional external hard drives.
For Linux Mint installations, this means:
- Faster boot times
- Smoother system updates
- Better overall responsiveness
SSK is a budget-friendly brand that offers strong performance for the price. While not as established as Samsung or SanDisk, it is widely used and well-reviewed.
If you’re looking for a good balance between performance and cost, this is a solid option.
- USB A to USB C Adapter – 3Pack – (Important for older laptops): Many newer SSDs ship with USB-C cables only. If your laptop has traditional rectangular USB ports, you may need this small adapter.
Disclosure: Purchases made through these links may generate a small commission for Jiritsu Lab, at no extra cost to you. This supports the website and the continued development of educational resources.
Note: Many external SSDs ship preformatted (often NTFS) and may contain files. In this guide, you’ll wipe the drive and create the Linux partitions before installing.
This walkthrough includes photographs for nearly every step, captured during a real installation on actual hardware. Some images were taken with a phone (rather than saved as perfect screenshots), so a few may look slightly blurry. The key buttons, menus, and drive labels should still be clear enough to follow. If anything looks different on your screen or you want a second set of eyes before clicking Install Now, feel free to reach out via the Contact page.
Proceed slowly. Confirm the correct drive before applying changes.
Phase B1 – Prepare the External SSD (Before Starting the Installer)
1) Boot into the Linux Mint Live USB
Connect both:
- The Linux Mint USB created in Mode 1
- The external SSD
Boot from the USB and enter the Linux Mint desktop (Live Session) as was done in Mode 2.
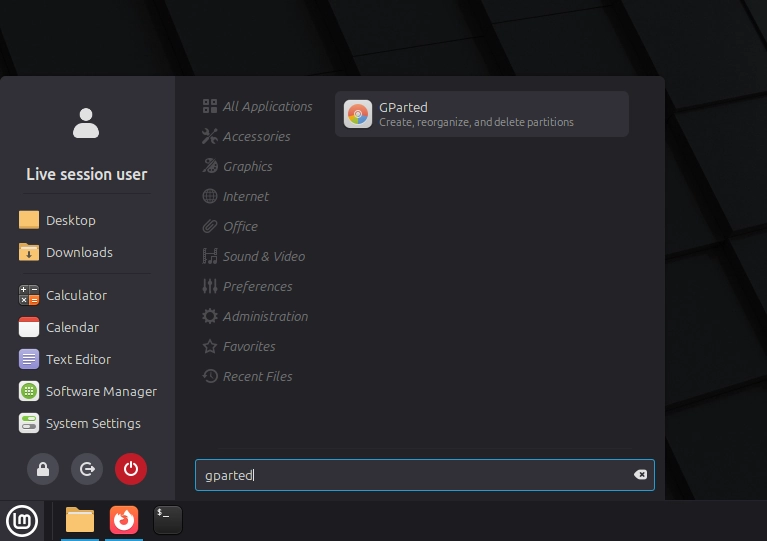
2) Open GParted
3) Select the correct external drive
This is the first verification moment.
In GParted, select the external drive by matching its size (for example: ~120GB / 240GB / 500GB). Ensure the selected drive is not the internal Windows disk.
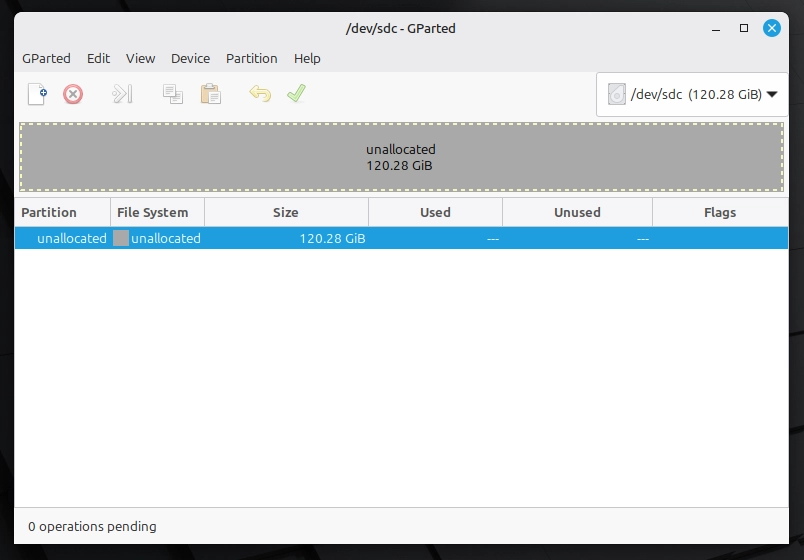
Expected: the external drive appears as empty/unallocated (or clearly identifiable as the intended install target).
If the external SSD is not unallocated
New external SSDs often arrive pre-formatted (usually NTFS) and may contain manufacturer files.
For this installation, the external SSD must be prepared for Linux.
If the external SSD does not contain any data you need to keep:
- Confirm the drive is the correct external SSD (verify by size).
- In GParted, delete the existing partitions on that external drive.
- Click the green checkmark to apply changes.
- The drive should now appear as unallocated.
Only proceed once the correct external SSD shows as unallocated space.
*Never delete partitions uless you are sure about whats on the drive.*
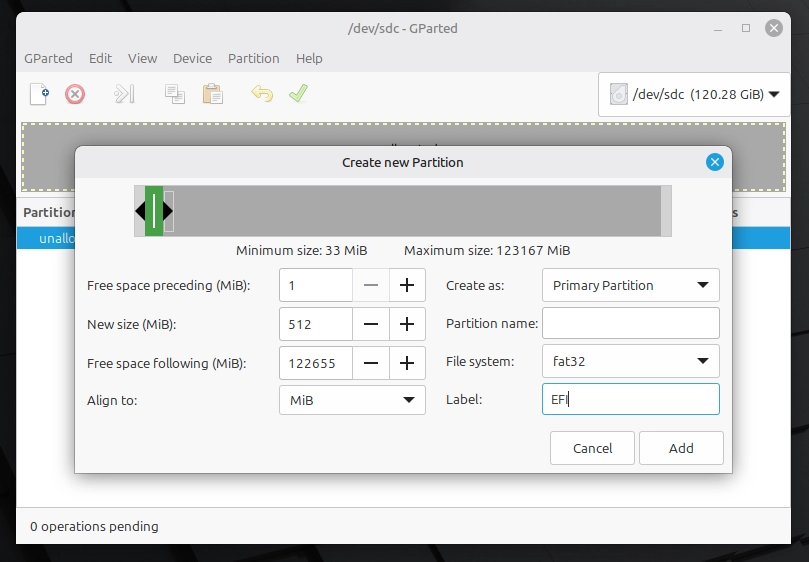
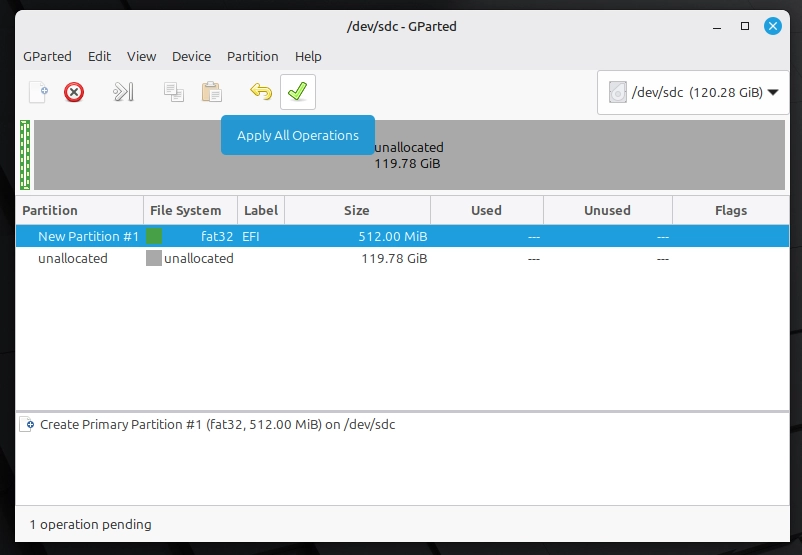
4) Create a 512MB EFI partition (FAT32)
Create the EFI Partition:
- Right-click the unallocated space.
- Select New.
- Set:
- Size: 512 MB
- File system: FAT32
- Label: EFI (optional)
- Click Add
Why create this small partition?
This small 512MB partition stores the boot files that allow the computer to start Linux.
It does not store your programs or personal files.
The main Linux system will be installed in the remaining unallocated space as a separate partition later on.
After clicking Add, the partition will appear, but it is not yet created.
No changes occur until operations are applied. Click the green checkmark to commit the changes and create the new partition.
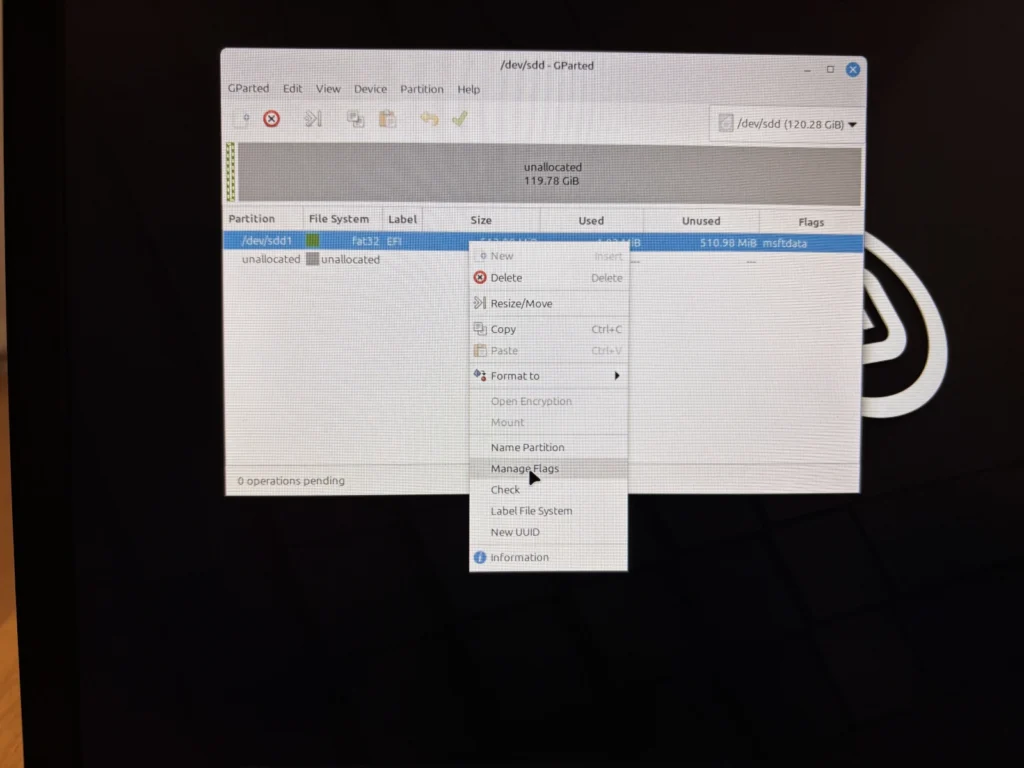
5) Right-click the new Fat32 partition
Click on “Manage Flags”
Why is this partition FAT32?
UEFI firmware can only read certain file systems at startup. FAT32 is the standard format required for the EFI System Partition.
6) Enable boot + esp flags
Open Manage Flags and confirm that:
- esp is enabled
- boot is enabled (if available)
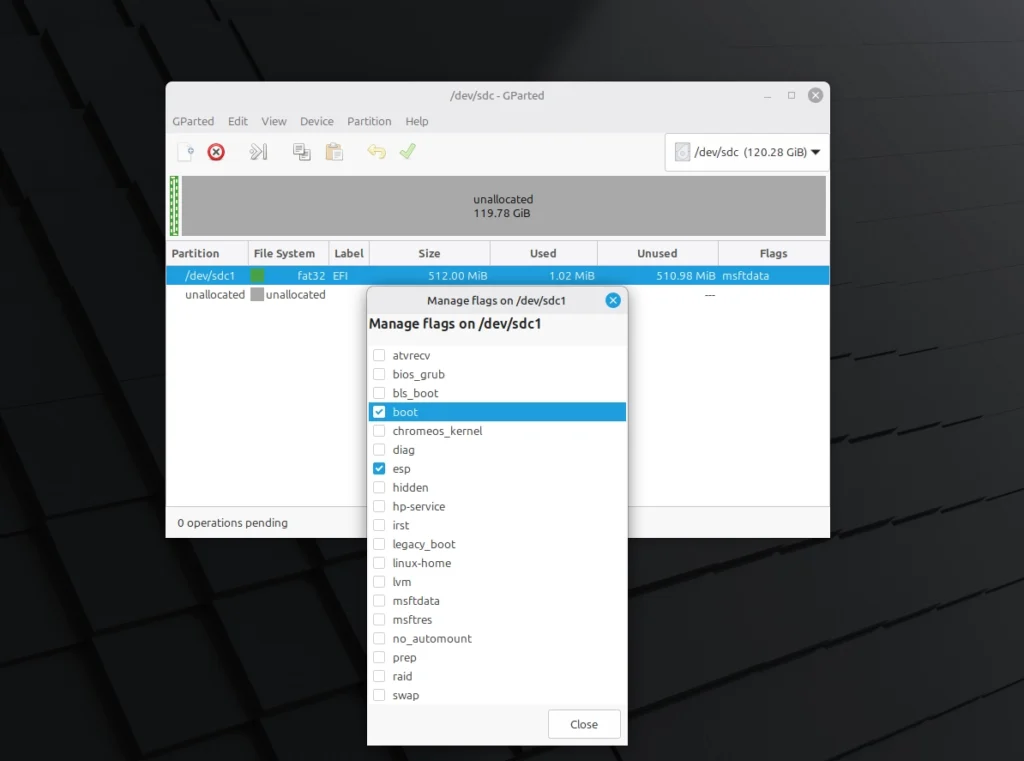
What are “boot” and “esp”?
The EFI System Partition (ESP) stores the files the computer uses to start Linux.
- esp marks the partition as the EFI System Partition.
- boot allows the partition to be used for startup.
On most systems, esp is the critical flag. If both esp and boot appear enabled, the partition is correctly configured for UEFI installation.
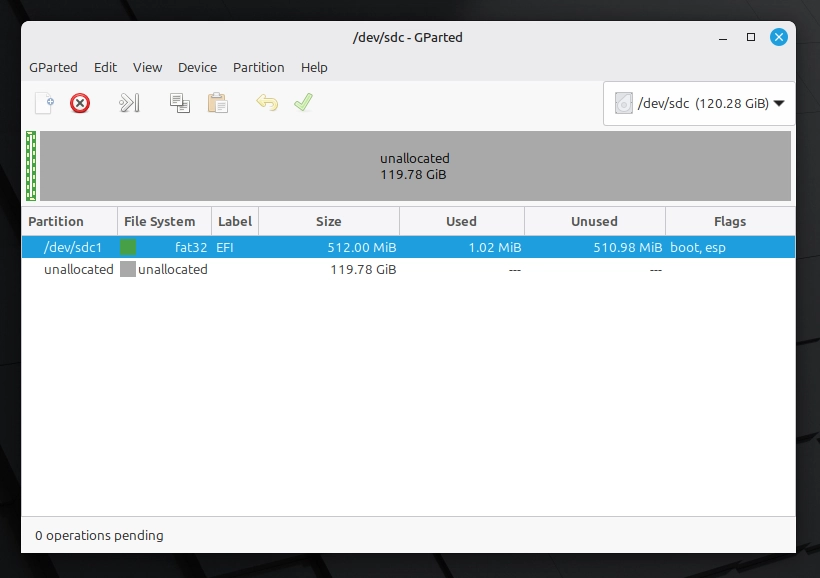
7) Confirm partition layout (verification)
At this point, all partition operations should already be applied.
Before closing GParted, confirm the following:
- A 512 MB FAT32 partition exists
- It is labeled EFI
- The flags show boot, esp
- The remaining space is allocated for your Linux installation (ext4 will be created in the installer)
At the bottom of the window, it should say:
0 operations pending
This confirms that all changes were successfully committed.
If everything matches, close GParted and move on to the next step.
Wait until the operations complete successfully.
✅ Verification moment #1 complete:
EFI partition exists, flags are correct, and no operations are pending.
Close GParted after verification.
Phase B2 – Start the Installer (Guided Screens)
8) Connect to Wi-Fi (optional but recommended)
Connect to Wi-Fi if possible. This allows Linux Mint to download updates, drivers, and multimedia codecs during installation.
If Wi-Fi is not available, the installation can still continue, but updates and some drivers may need to be installed later.
9) Launch the installer
From the Live USB desktop, double-click the Install Linux Mint CD icon in the top-left corner to launch the installer.
10) Select language
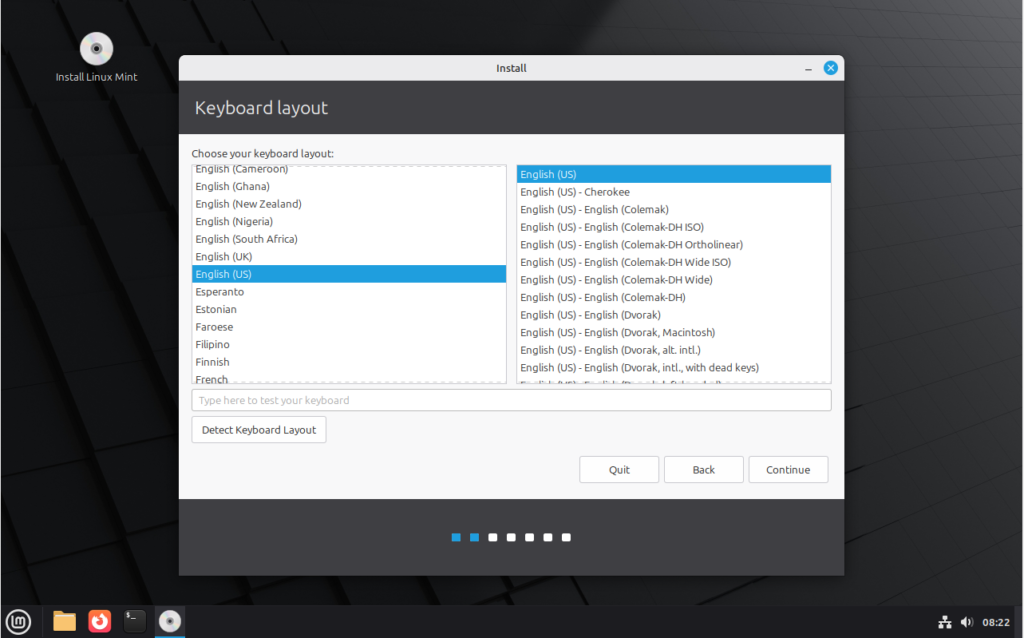
11) Select keyboard layout
12) Enable multimedia codecs
Check Install multimedia codecs (recommended for everyday media playback).
Phase B3 – Manual Installation Target Selection
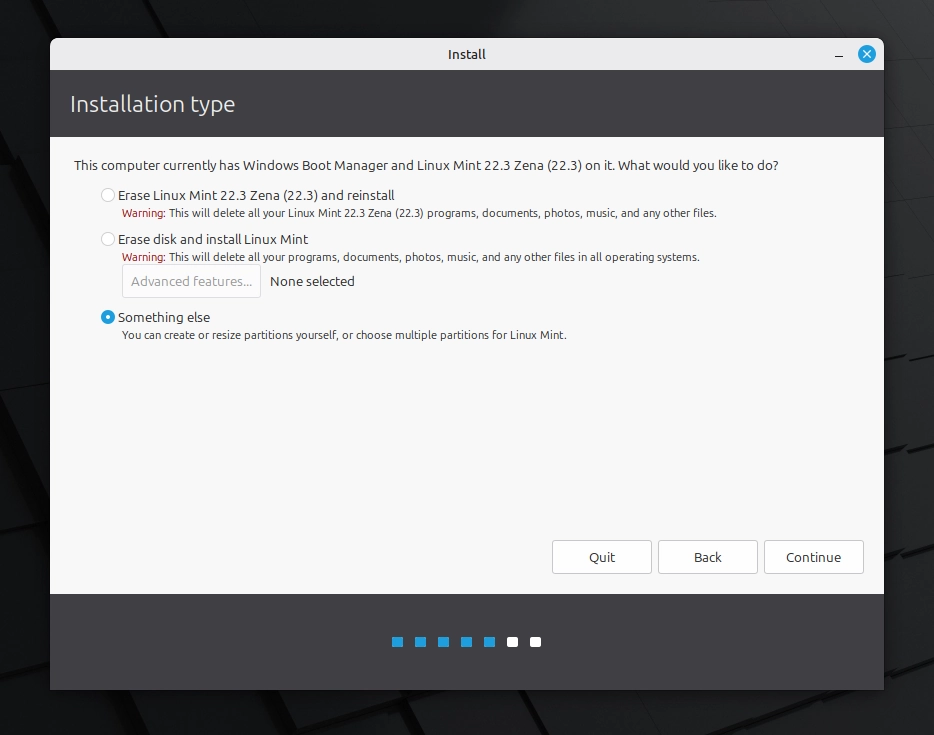
13) Choose “Something else”
At Installation type, select:
Something else
This enables manual control over partitions and bootloader location.
14) Select the EFI partition (do not format)
Select the existing EFI partition created in GParted, then click Change.

Set:
- Use as: EFI System Partition
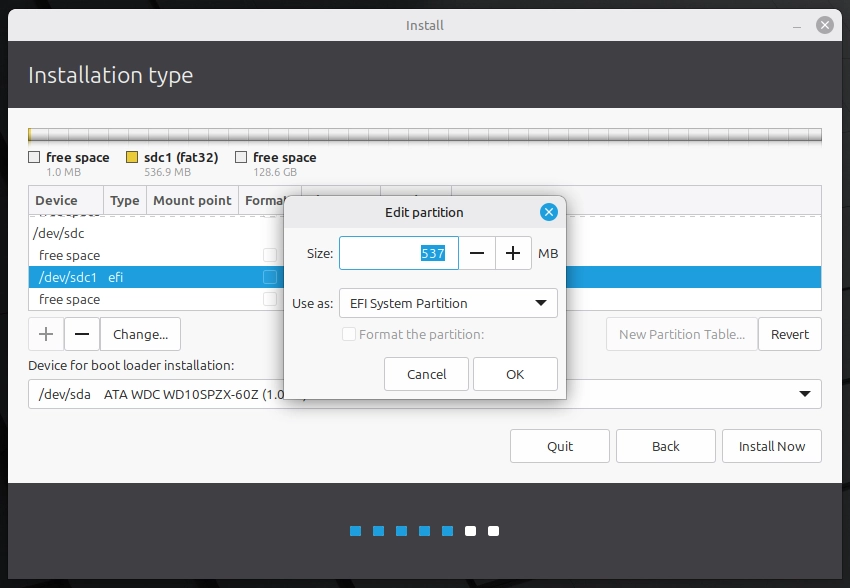
- Format: ❌ Do NOT check Format (the partition was already created and formatted in GParted)
- Click “OK“
15) Create the main Linux partition (ext4, mounted at /)
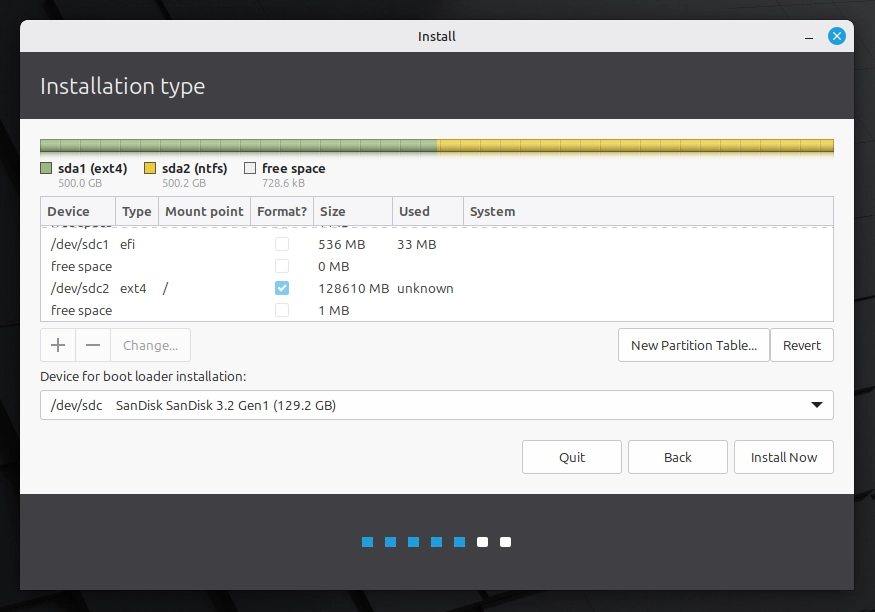
Select the remaining free space and click + to create the main Linux partition.
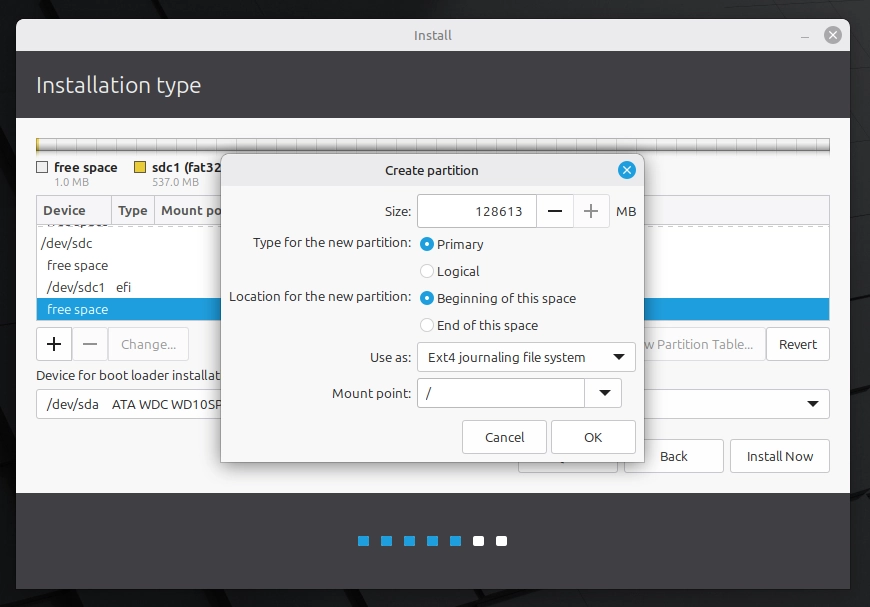
Settings:
- Use as: Ext4 journaling file system
- Mount point:
/ - Format: ✅ Check Format
Formatting should only apply to the Linux partition on the external SSD.
Important:
✅ Only the Linux (ext4) partition on the external SSD should be formatted.
❌ Do not format any Windows partitions or any internal drive partitions.
✅ Critical Step: Set “Device for boot loader installation” to the entire external SSD
At the bottom of this screen, you’ll see a dropdown called:
Device for boot loader installation
This setting decides where the computer will look for Linux when it starts.
What to select (correct)
Select the external SSD itself — the entry that looks like:
/dev/sdc — SanDisk … (129 GB)/dev/nvme1n1— (external NVMe enclosure)/dev/sda, b or c — (your external drive’s name/size)
**It must NOT end in a number.**
What NOT to select (wrong)
Do not pick a partition like:
/dev/sdc1(EFI partition) ❌/dev/sdc2(Linux ext4 partition) ❌- anything that ends in 1, 2, 3… ❌
If you choose a partition instead of the full drive, the system may install correctly but fail to boot.
Quick double check
Before clicking Install Now, confirm these two things:
- The dropdown shows the external drive model/size (SanDisk 128GB, Samsung T7 1TB, etc.)
- The selected device is the whole disk (example:
/dev/sdd, not/dev/sdd1)
If the dropdown shows your internal Windows drive (often the largest one), stop and fix it before continuing.
NOTE: Drive labels can differ between systems (for example, /dev/sda, /dev/sdb, or /dev/sdc). Do not rely on the letter alone – identify the correct drive by its size and (when available) its model name (for example, “SanDisk 128GB”).
16) Confirmation after clicking “Install Now”
This is the second verification moment.
After Install Now is clicked, the installer shows a confirmation box (often titled “Write the changes to disks?”) listing:
- Which disk(s) will be modified
- Which partition(s) will be formatted (usually the new ext4 Linux partition)
Before clicking Continue, confirm the following:
- The disk shown as being changed is the external SSD (identify it by size/model, not only by
/dev/sdX). - The only partition listed as “going to be formatted” is the Linux ext4 partition on the external SSD.
- No internal Windows drive partitions are listed.
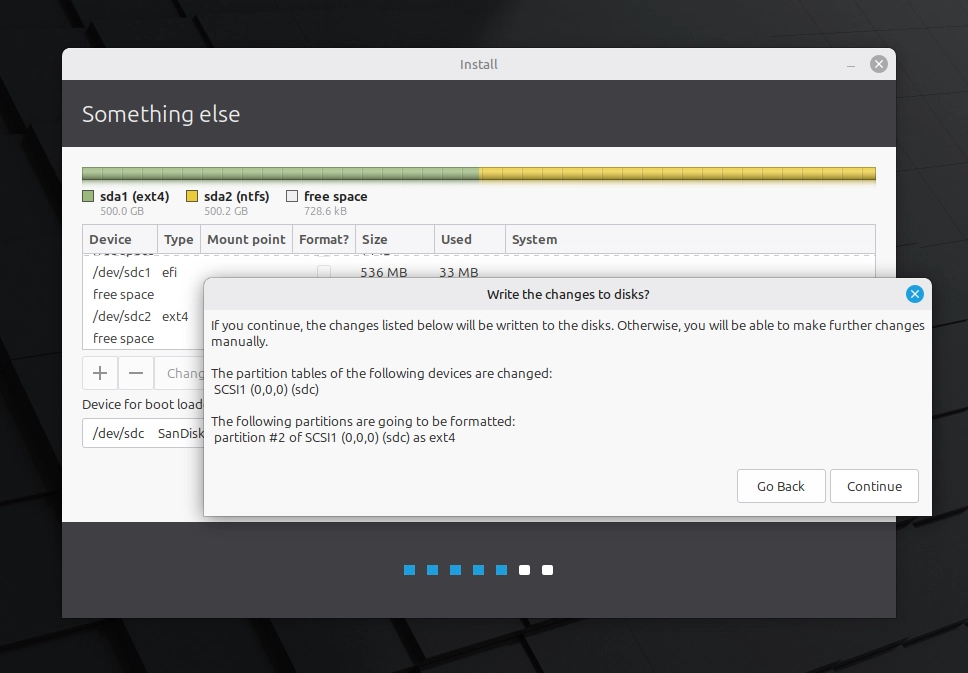
✅ Verification moment #2 complete: the correct external disk is targeted, and only the intended Linux partition will be formatted.
Phase B4 – Final Configuration and Installation
17) Select region / timezone
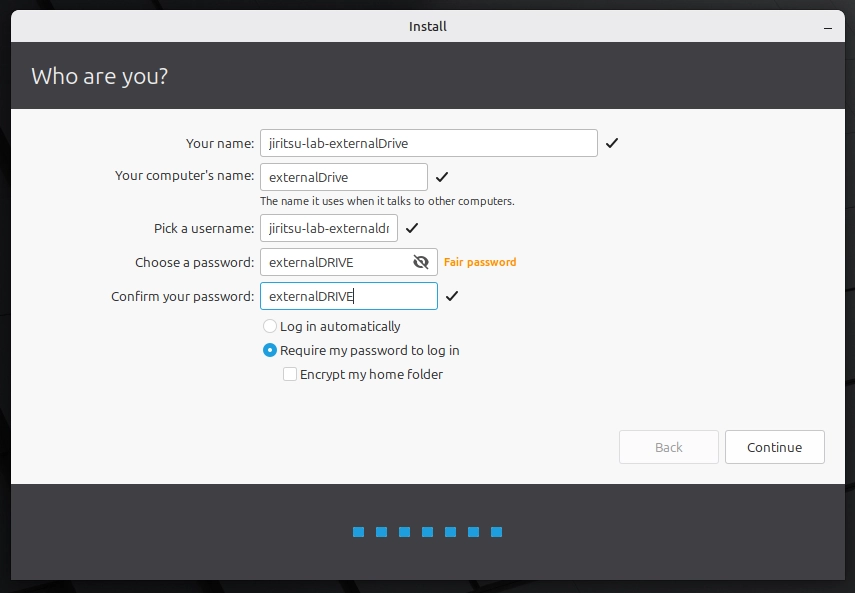
18) Create username and password
Enter your account details and login preferences.
On this screen:
- Your name — Display name used within the system.
- Computer name — How this device appears on a network (this can be left as suggested).
- Username — Used to log in and shown in file paths (e.g.,
/home/username). - Password — Required for login and administrative tasks.
Recommended settings
- Select “Require my password to log in” (recommended for security).
- Leave “Encrypt my home folder” unchecked unless full-disk privacy is specifically required.
Note: On Linux, the account password is used more frequently than many users expect (for installing software and making system changes), so it should be secure and easy to remember.
After completing the fields, click Continue.
19) Restart when installation completes
When the installation completes, click Restart Now.
The system will begin shutting down.
When prompted, remove the Linux Mint USB drive, then press Enter.
The computer will restart.
If using an external SSD installation, ensure the external drive remains connected so the system can boot from it.
After reboot, the Linux Mint login screen should appear.
20) Boot from the external SSD and confirm successful login
After restarting, it is very likely that the computer will boot back into Windows by default.
Use the Boot Menu (for example: F12, Esc, etc.) and manually select the external SSD.
When selecting the boot device, the external SSD may not be labeled “Linux Mint.” It may appear as the drive brand/model, a UEFI USB entry, or even ubuntu. Select the entry that matches the external drive by name/brand or by size.
When the Linux Mint login screen appears, look at the computer name displayed in the top-left corner.
That name should match the computer name entered during installation.
If the name matches, this confirms:
- The system is booting from the external SSD
- The installation completed successfully
- The internal Windows drive was not modified
A successful login screen that shows your chosen computer name is the final verification of Path B.
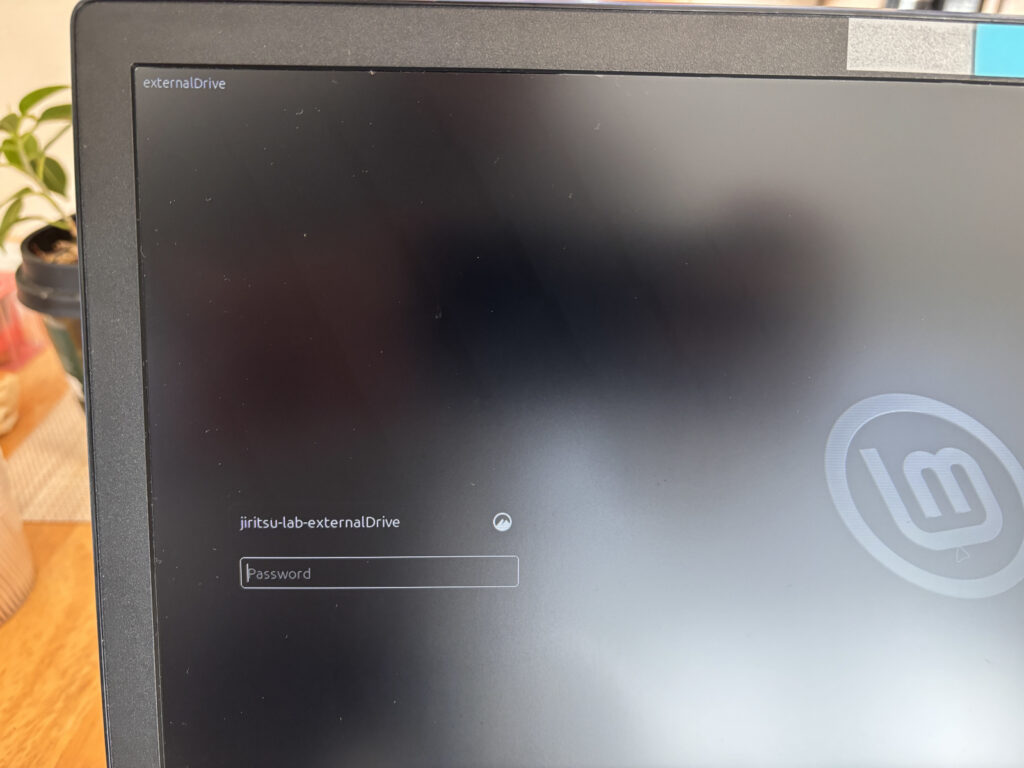
✅ Verification moment #3 complete: Linux is booting from the external SSD.
Key Verification Moments
- Correct external drive selected in GParted before creating partitions
- Bootloader device set to the external SSD before installation begins
- Linux Mint login screen appears after reboot when booting from the external SSD
⏸ Stopping Point. Installation Complete.
If you are seeing the Linux Mint login screen when booting from your external SSD, the installation was successful.
You can safely stop here.
At this stage:
- Linux is installed on the external SSD
- Windows remains unchanged on the internal drive
- You can choose which system to boot using the Boot Menu
- Nothing further is required today
If you remove the external SSD and restart the computer, it will boot directly into Windows as before.
Take a moment to confirm everything feels normal. Log in if you’d like, or power off and continue later.
There is no need to continue immediately.
When you’re ready, proceed to Mode 5 | First Setup Inside Linux to learn the basics of daily use and some other Linux Mints tips.